
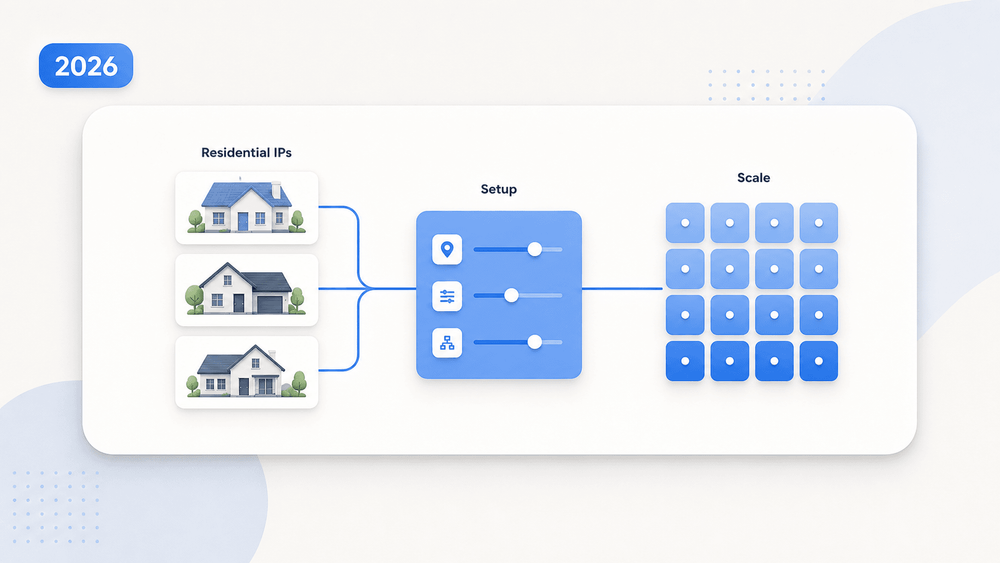
ज़्यादातर लोग residential proxies खरीदते हैं, फिर भी एक हफ्ते के अंदर ही block हो जाते हैं। IP सही था। बाकी सब गलत था।
मैंने proxy forums, provider dashboards, और scraping pipelines पर काफी समय बिताया है। पैटर्न बार-बार एक जैसा दिखता है: कोई residential proxy service लेता है, requests भेजता है, और लगभग तुरंत block हो जाता है। फिर वह provider को दोष देता है। दूसरे provider पर जाता है। नतीजा वही। समस्या लगभग कभी सिर्फ “bad IPs” नहीं होती — असली दिक्कत IP के आसपास की पूरी setup होती है। residential proxy market अब अनुमानतः 2024 में USD 1.47 billion से ऊपर है और 2035 तक USD 7.5 billion की ओर बढ़ रहा है, और Proxyway की 2026 research ने 2025 में अकेले 50 से ज्यादा नए proxy vendors की पहचान की। इतने शोर में उलझना आसान है। यह guide पूरी तस्वीर देती है: provider चुनना, billing समझना, hands-on setup, और — सबसे ज़रूरी — वे layered techniques जो आपको सच में radar के नीचे रखती हैं।
Residential Proxies क्या हैं (और आपको इनकी परवाह क्यों करनी चाहिए)?
Residential proxy आपके internet traffic को उस IP address के जरिए route करता है जो किसी consumer ISP ने दिया होता है — वही तरह का IP जो आपके घर के router पर होता है। जब कोई website आपकी request देखती है, तो उसे ऐसा लगता है कि यह किसी normal व्यक्ति के घर से browsing करके आ रही है, न कि Virginia के किसी server rack से।
यह कैसे काम करता है: proxy provider इन IPs तक access real household devices से लेता है — आमतौर पर opt-in apps या SDKs के ज़रिए, जहाँ users बदले में कुछ लाभ के लिए अपनी unused bandwidth share करते हैं। आपकी request आपके machine से provider के gateway तक जाती है, फिर इन residential IPs में से किसी एक के जरिए target website तक पहुँचती है, और response उसी रास्ते वापस आता है।
इसका user base बहुत broad है: कोई भी जिसे normal internet traffic में घुलमिलना हो। Sales teams business directories scrape करती हैं। Ecommerce ops competitor prices monitor करती हैं। Marketing teams specific cities में ad placements verify करती हैं। Goal हमेशा एक ही है: bot नहीं, एक regular consumer जैसा दिखना।
एक बात पहले से समझनी चाहिए: सभी residential IP sourcing बराबर नहीं होती। कुछ providers transparent opt-in programs इस्तेमाल करते हैं। दूसरे bundled SDKs, misleading consent, या उससे भी खराब तरीकों पर निर्भर करते हैं। Google's Threat Intelligence Group ने जनवरी 2026 में जिस residential proxy botnet को दुनिया के सबसे बड़े botnets में से एक माना था, उसे disrupt किया, और उसी साल FBI ने residential proxy advisory जारी करके इन networks के criminal misuse की चेतावनी दी। Ethical sourcing सिर्फ nice-to-have नहीं है — यह आपके uptime, legal exposure, और इस बात को प्रभावित करता है कि उपयोग से पहले IPs पहले ही burn तो नहीं हो चुके।
Residential Proxies क्यों महत्वपूर्ण हैं: Sales, Ecommerce, और Ops Teams के लिए असली Use Cases
Residential proxies hackers की curiosity नहीं हैं — यह business teams के लिए practical tool हैं जिन्हें accurate, location-specific web data चाहिए या जिन्हें multiple accounts संभालने हैं बिना correlation alarms trigger किए। असल workflows में ये यहाँ काम आते हैं:
| Use Case | Residential Proxies कैसे मदद करते हैं | किसे फायदा होता है |
|---|---|---|
| Lead generation & contact scraping | Directories और local listings अक्सर IP के हिसाब से rate-limit करते हैं या local results दिखाते हैं। Residential IPs से आप वही देखते हैं जो एक local prospect देखता है। | Sales, BDR teams |
| Ecommerce price & SKU monitoring | Retail sites region-specific pricing, inventory, और MAP compliance signals दिखाते हैं। Residential IPs real shoppers जैसा व्यवहार करते हैं। | Ecommerce ops, pricing analysts |
| Ad verification & local SEO | Ad placements या local search rankings verify करने के लिए वही content देखना होता है जो उसी city का user देख रहा हो। | Marketing, SEO teams |
| Multi-account management | Stable residential या ISP sessions marketplace या social accounts के बीच accidental IP-correlation flags कम करते हैं। | Account managers (ToS caution के साथ) |
| Market research & competitive intel | Geo-restricted content access करना, localized competitors review करना, या public data को scale पर aggregate करना। | Strategy, research teams |
Proxyway की 2026 report confirm करती है कि ecommerce अभी भी proxy का सबसे popular use case है, जबकि AI data access तेज़ी से बढ़ रहा है। Webshare का ad-verification documentation बताता है कि proxies advertisers को user locations mimic करने में कैसे मदद करते हैं ताकि delivery check हो सके और fraud पकड़ा जा सके।
Multi-account management पर एक नोट: कई platforms coordinated accounts या identity obfuscation को साफ़ तौर पर मना करते हैं। अगर आप legitimate regional accounts संभाल रहे हैं, तो platform rules का पालन करें। Proxies prohibited behavior को acceptable नहीं बनाते।
Residential Proxies vs. Datacenter, Mobile, और VPN: फर्क समझें
Residential proxies हमेशा सही tool नहीं होते। ये datacenter proxies से महंगे और धीमे होते हैं, इसलिए खरीदने से पहले tradeoffs समझना असली पैसे बचाता है।
| Proxy Type | IP Source | Detection Risk | Typical Cost (2026) | Best For |
|---|---|---|---|---|
| Residential | Consumer ISP, P2P/SDK pools | Protected sites पर कम | USD 3–15/GB | Ecommerce monitoring, geo checks, public scraping |
| Datacenter | Cloud/hosting providers | Protected sites पर ज़्यादा | लगभग USD 0.5/IP से | High-volume, low-risk scraping, internal testing |
| Mobile | Carrier networks (carrier-grade NAT) | बहुत कम | Residential से ज़्यादा | App testing, mobile-specific content, strict targets |
| VPN | Centralized VPN servers | Automation के लिए high (known ranges) | Low monthly consumer pricing | Privacy, manual browsing, simple region switching |
Decision rule सीधी है: अगर target site datacenter traffic को actively block करती है और आपको किसी specific location में real user जैसा दिखना है, तो residential proxies सही विकल्प हैं। अगर speed और cost stealth से ज़्यादा मायने रखते हैं, तो datacenter proxies ठीक हैं। बहुत strict targets के लिए mobile proxies आख़िरी विकल्प हैं, और VPN privacy के लिए हैं — scale के लिए नहीं।
Residential Proxy Provider कैसे चुनें (असल में क्या मायने रखता है)
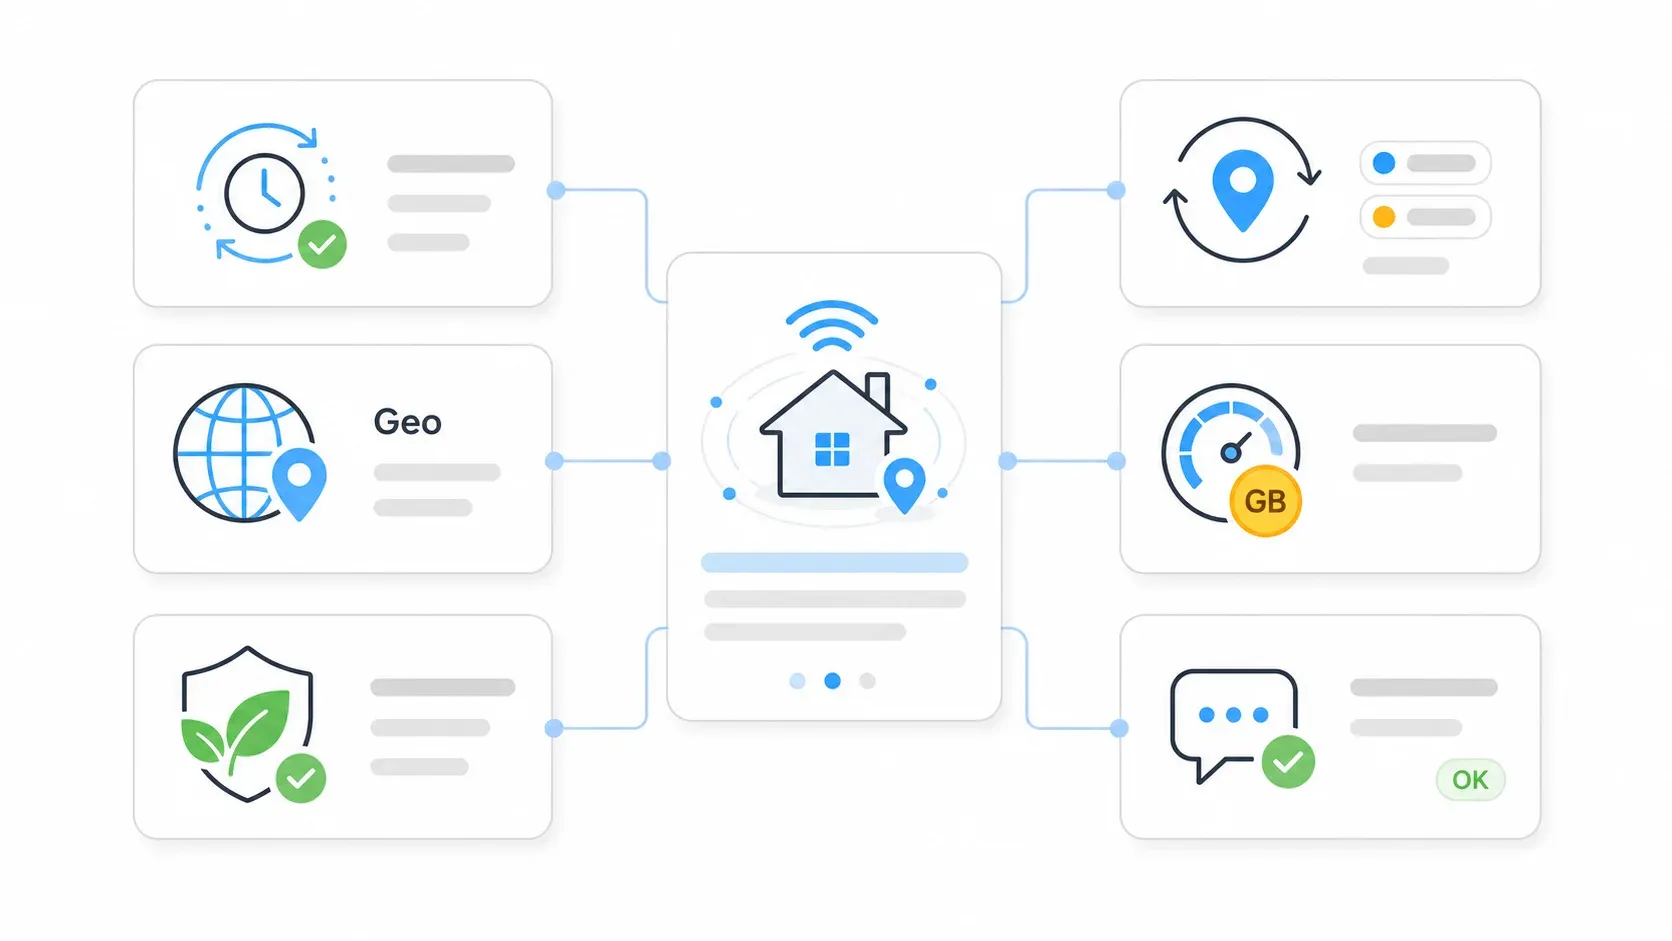
ज़्यादातर “top 10 proxy” articles ऐसे features के आधार पर ranking करती हैं जिनकी किसी को खास परवाह नहीं होती। Forum users कुछ और बताते हैं — उन्हें IP freshness, trial before commitment, geo-targeting accuracy, और यह कि IPs सच में residential हैं या नहीं, इसकी परवाह होती है।
Trust issue असली है: कुछ providers datacenter IPs को residential के रूप में बेचते हैं। पैसा लगाने से पहले pool composition को PixelScan, BrowserLeaks, या IPinfo जैसे tools से verify करें।
यहाँ वह evaluation framework है जो सच में काम आता है:
| Criterion | क्यों महत्वपूर्ण है | कैसे verify करें |
|---|---|---|
| IP pool size & freshness | Overused IPs जल्दी flag हो जाते हैं। बड़े advertised pools में inactive या duplicate IPs हो सकते हैं। | छोटा pilot चलाएँ; unique IPs, ASN diversity, duplicate rate, और block rate log करें। Proxyway का real pool-size study actual vs. advertised की तुलना करता है। |
| Subnet & ASN diversity | एक ही ASN से बहुत सारे IPs होना अस्वाभाविक लगता है। | IPinfo, MaxMind, या BrowserLeaks से IPs check करें। |
| Geo-targeting granularity | Local SEO या ad verification के लिए country-level काफी नहीं है। City या ZIP-level चाहिए। | Plan खरीदने से पहले country, state, city, और ZIP targets test करें। देखें target site असल में क्या दिखाती है। |
| Ethical IP sourcing | Unclear sourcing legal, security, और uptime risk बढ़ाती है। | Consent language, transparency reports, KYC/abuse policies, और opt-out mechanisms देखें। |
| Session control flexibility | अलग-अलग कामों को rotating और sticky sessions दोनों चाहिए होते हैं। | दोनों session types उपलब्ध हैं या नहीं, confirm करें; sticky session duration limits test करें। |
| Support & docs quality | Beginners auth, ports, और session syntax में अटकते हैं। | Quickstart docs पढ़ें और खरीदने से पहले support question पूछें। Response time देखें। |
| Billing model fit | Per-GB, per-IP, per-request, और PAYG से वास्तविक लागत बहुत बदल जाती है। | Plan चुनने से पहले realistic page sizes और retries के आधार पर bandwidth estimate करें। |
Reference के लिए, यहाँ कुछ current provider pool-size claims हैं (इन्हें marketing figures समझें, audited numbers नहीं):
- Bright Data: 195 देशों में 400M+ monthly residential IPs का दावा करता है
- Oxylabs: 175M+ residential IPs का दावा करता है
- Decodo (Smartproxy): city/ZIP targeting के साथ 115M+ IPs का दावा करता है
- NetNut: 195+ देशों में 85M+ residential IPs का दावा करता है
Residential Proxy Pricing Models समझें: Per-GB, Per-IP, Per-Request, और PAYG
यहीं ज़्यादातर articles चूक जाती हैं: वे prices तो दिखा देती हैं, लेकिन billing models समझाती नहीं हैं, इसलिए आप अपनी असली लागत का अंदाज़ा नहीं लगा पाते।
| Model | यह कैसे काम करता है | किसके लिए बेहतर | किस बात से सावधान रहें |
|---|---|---|---|
| Per-GB | Transfer हुई bandwidth के लिए pay करें | Heavy scraping, media-rich pages | Images, JS, retries से cost बढ़ जाती है |
| Per-IP / Per-Port | हर IP address पर fixed fee | Static residential / ISP proxies, account management | Rotation options सीमित हो सकती हैं |
| Per-Request | हर API call पर flat rate | Scraping APIs | बहुत high volume पर महंगा |
| PAYG | कोई commitment नहीं, जितना use किया उतना pay | Testing, unpredictable volume | Per-unit cost ज़्यादा होता है |
| Monthly subscription | हर महीने GB या IPs का quota | Predictable, high-volume use | Unused quota = पैसा बर्बाद |
एक Practical Cost Example
मान लीजिए आप 10,000 product pages scrape कर रहे हैं, जिनका average size 500KB है। यह लगभग 5GB bandwidth बनती है, retry, images, scripts, या browser overhead से पहले। USD 7/GB पर base proxy cost लगभग USD 35 होती है। लेकिन real browser-based scraping में — जहाँ JavaScript, fonts, tracking pixels, और retries जुड़ जाते हैं — actual bandwidth 3–5x तक हो सकती है। आपका USD 35 का estimate असल में USD 100–175 हो सकता है।
मौजूदा Price Signals
| Provider | Public Residential Price | Source |
|---|---|---|
| Bright Data | लगभग USD 5.88/GB से (PAYG promo लगभग USD 4/GB) | Bright Data pricing |
| Oxylabs | 5GB पर USD 6/GB, 20GB पर USD 5/GB, 125GB पर USD 4/GB | Oxylabs pricing |
| Decodo | 3GB पर USD 3.75/GB, 10GB पर USD 3.50/GB, 25GB पर USD 3.25/GB | Decodo pricing |
| SOAX | 25GB पर USD 3.60/GB, 50GB पर USD 3.40/GB, 800GB पर USD 2/GB | SOAX pricing |
Hidden Costs जिनकी कोई बात नहीं करता
- Failed requests भी bandwidth consume करते हैं। CAPTCHA page या block page भी वही data है जिसके लिए आपने pay किया।
- DNS resolution और SSL handshakes हर request पर लगभग 1–3KB जोड़ते हैं। Scale पर यह बड़ा हो जाता है।
- Browser rendering images, fonts, scripts, और tracking pixels डाउनलोड करता है जिनकी शायद आपको ज़रूरत भी न हो।
- Minimum deposits और expiring credits low-volume plans को headline rate से महंगा बना सकते हैं।
- Retries और warm-up traffic login, pagination, और session establishment के लिए free नहीं होते।
Sticky vs. Rotating Residential Proxy Sessions: निर्णय Framework
सबसे आम configuration mistake जो मैं देखता हूँ: continuity वाले tasks के लिए rotating sessions, या distribution वाले tasks के लिए sticky sessions इस्तेमाल करना।
| Factor | Rotating Sessions | Sticky (Static) Sessions |
|---|---|---|
| Best for | Independent requests: SERP checks, price pulls, broad monitoring | Session-dependent tasks: login, checkout, pagination, cart flows |
| IP lifespan | हर request (या short interval) पर नया IP | वही IP 10–60 मिनट तक (provider-dependent) |
| Detection risk | Behavior coherent न हो तो noisy लग सकता है | ज़्यादा use करने पर rate limits जमा हो सकती हैं |
| Bandwidth cost | Target के react करने पर retries ज़्यादा हो सकती हैं | Session warm-ups कम, लेकिन blocked sticky IPs time बर्बाद करते हैं |
Decodo का documentation बताता है कि rotating sessions हर नई request पर बदल सकती हैं, जबकि sticky sessions IP को 60 मिनट तक hold कर सकती हैं।
Thumb rule: अगर आपके task को requests के बीच आपको याद रखना है (login, shopping cart, pagination), तो sticky इस्तेमाल करें। अगर हर request independent है (SERP checks, price pulls), तो rotating बेहतर है।
Practical तौर पर, ज़्यादातर scraping workflows rotating sessions इस्तेमाल करते हैं। Account management और checkout flows को sticky चाहिए। कई providers एक ही plan में दोनों देते हैं — खरीदने से पहले verify करें।
Residential Proxies कैसे सेट करें: Step-by-Step Walkthrough
ऑनलाइन लगभग कोई article proxy setup को step by step नहीं समझाता। मैंने कई providers पर proxies configure किए हैं, और process अलग कम, मिलता-जुलता ज़्यादा है — तो यहाँ असली walkthrough है।
- Difficulty: Beginner
- Time Required: पहली successful request के लिए लगभग 15 मिनट
- What You'll Need: Residential proxy account, terminal या browser, और test करने के लिए target URL
Step 1: Account बनाइए और Proxy Credentials लीजिए
अपने चुने हुए provider पर sign up करें। Dashboard में जाकर proxy endpoint (hostname), port, username, और password ढूँढें। कुछ providers API token या country/city targeting syntax भी देते हैं जिसे आप username में जोड़ते हैं।
आपको कुछ ऐसा दिखना चाहिए:
- Host:
gate.provider.com - Port:
8000 - Username:
user-country-us-city-newyork - Password:
yourpassword123
[screenshot: provider dashboard showing proxy credentials and endpoint details]
Step 2: Authentication Method चुनें
| Method | किसके लिए बेहतर | Tradeoff |
|---|---|---|
| Username:Password | Scripts, browsers, team tools | आसान है, लेकिन credentials सुरक्षित रखने होंगे |
| IP Whitelisting | Servers या fixed office IPs | Authentication साफ़, लेकिन बदलते IPs पर टूट सकता है |
| API Token | Managed APIs और dashboard workflows | Automation के लिए अच्छा, लेकिन key की तरह protect करना होगा |
ज़्यादातर beginners को username:password से शुरू करना चाहिए। यह हर जगह काम करता है और server configuration नहीं माँगता।
Step 3: Protocol चुनें — HTTP, HTTPS, या SOCKS5
| Protocol | किसके लिए बेहतर | Encrypted? | Speed |
|---|---|---|---|
| HTTP | Basic scraping, browsing | नहीं (proxy hop unencrypted है) | तेज़ |
| HTTPS | Login sessions, sensitive data | हाँ (destination traffic HTTPS है) | तेज़ |
| SOCKS5 | Multi-account, non-HTTP traffic | Destination पर निर्भर | कुछ use cases में तेज़ |
ज़्यादातर web scraping के लिए HTTPS default है। SOCKS5 anti-detect browsers या non-HTTP protocols के लिए उपयोगी है। HTTP quick tests के लिए ठीक है, अगर target sensitive नहीं है।
Step 4: curl से पहली request test करें
official curl documentation confirm करती है कि proxy credentials -U या --proxy-user से pass किए जा सकते हैं।
curl -x http://gate.provider.com:8000 \
  -U "user-country-us:yourpassword123" \
  https://ipinfo.io/json
आपको एक JSON response दिखना चाहिए जिसमें US-based residential IP, ISP name (hosting company नहीं), और अगर आपने city specify की है तो सही city हो।
अगर timeout या authentication error आए: credentials दोबारा check करें, port confirm करें, और देखें आपका provider account active और funded है या नहीं।
Step 5: Python requests के साथ test करें
Requests library documentation proxies dictionary में proxy URLs को support करती है।
import requests

proxy = "http://user-country-us:yourpassword123@gate.provider.com:8000"
proxies = {
    "http": proxy,
    "https": proxy,
}

response = requests.get("https://ipinfo.io/json", proxies=proxies, timeout=30)
print(response.json())
Output में consumer ISP name के साथ residential IP दिखना चाहिए। अगर datacenter ASN (जैसे Amazon, Google, या DigitalOcean) दिखे, तो शायद आपका provider असली residential IPs नहीं दे रहा — यह red flag है।
Step 6: Playwright के साथ test करें (Browser-Based Scraping के लिए)
Playwright की Python docs HTTP(S) और SOCKS proxies को globally या per browser context support करती हैं।
from playwright.sync_api import sync_playwright

with sync_playwright() as p:
    browser = p.chromium.launch(proxy={
        "server": "http://gate.provider.com:8000",
        "username": "user-country-us",
        "password": "yourpassword123",
    })
    page = browser.new_page()
    page.goto("https://ipinfo.io/json")
    print(page.text_content("body"))
    browser.close()
Step 7: Rotation और Session Rules सेट करें
अपने provider dashboard में, use case के हिसाब से rotating या sticky sessions सेट करें (ऊपर दिया गया decision framework देखें)। Rotating में आमतौर पर हर request पर नया IP मिलता है। Sticky में आप username के साथ session ID जोड़ते हैं — जैसे user-country-us-session-abc123 — और provider उस IP को तय अवधि तक hold रखता है।
Step 8: कई tools से verify करें
सिर्फ एक IP checker पर भरोसा न करें। कई tools इस्तेमाल करें:
- ipinfo.io: ASN, company, geolocation, privacy flags
- BrowserLeaks: Browser, WebRTC, canvas, और IP leak checks
- PixelScan: Proxy/fingerprint consistency checks
- whatismyipaddress.com: जल्दी से apparent IP और location
सिर्फ apparent IP नहीं, target site का actual content भी verify करें। Proxy IP checker pass कर सकता है, फिर भी target site उसे block कर सकती है या अलग content दे सकती है।
Ban से कैसे बचें: क्यों सिर्फ Residential Proxies से Modern Anti-Bot Systems नहीं हारते
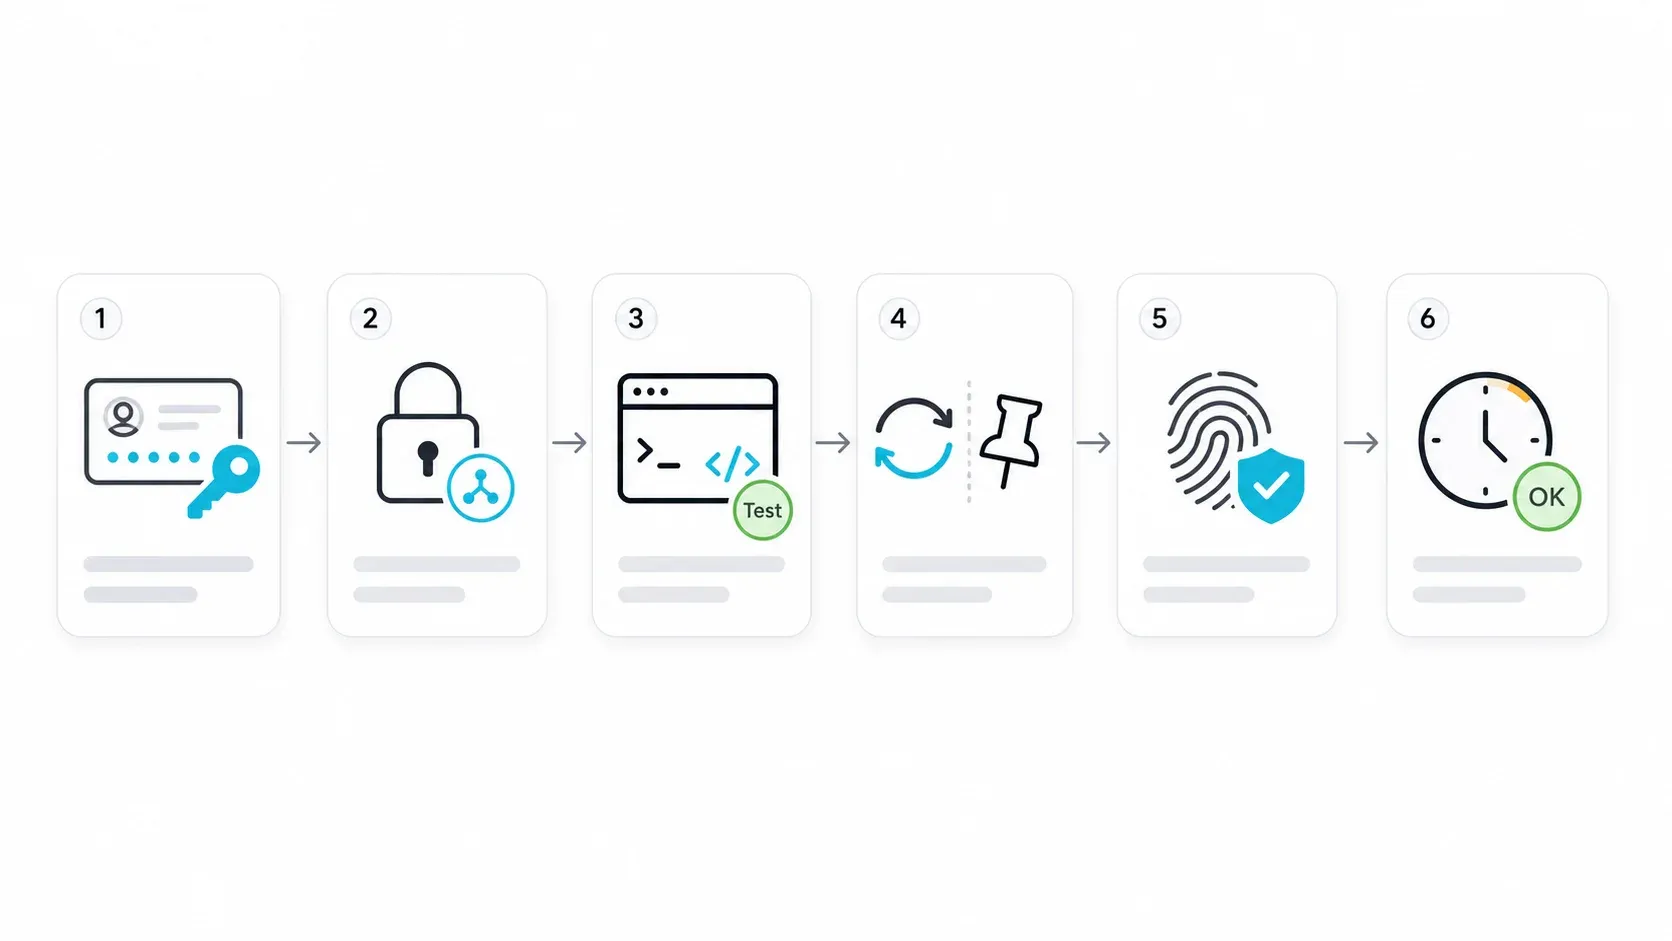
Residential IP होना ज़रूरी है, लेकिन पर्याप्त नहीं — और ज़्यादातर proxy guides इस हिस्से को पूरी तरह छोड़ देती हैं। Modern anti-bot systems एक साथ कई layers देखती हैं।
आपके IP Address से आगे की Detection Layers
TLS/JA3 fingerprinting: जब आपका client HTTPS connection शुरू करता है, तो handshake से client के communication style का fingerprint निकलता है। Cloudflare की documentation बताती है कि JA3/JA4 fingerprints TLS clients को उनकी connection characteristics के आधार पर पहचानते हैं। Salesforce की मूल JA3 engineering post और गहराई से बताती है: JA3 client को fingerprint करता है, JA3S server response को। अगर आप User-Agent में Chrome होने का दावा करते हैं लेकिन आपका TLS fingerprint “Python requests” कह रहा है, तो पकड़ हो जाती है।
HTTP header consistency: User-Agent, Accept-Language, sec-ch-ua, encoding, और header ordering सब एक-दूसरे से मेल खाने चाहिए। अगर request macOS पर Chrome का दावा कर रही है लेकिन Linux-style headers भेज रही है, तो यह suspicious है।
Browser fingerprinting: Canvas, WebGL, fonts, screen size, timezone, WebRTC, और automation flags (जैसे navigator.webdriver) headless browsers या unnatural environments की पहचान कर सकते हैं। DataDome का research इन signals के combinations से detection बताता है।
Behavioral analysis: Request timing, scrolling, mouse movement, navigation depth, और session history। “home user” IP से 100 pages per second हिट करना घर के user जैसा नहीं लगता।
JavaScript execution: कई sites expect करती हैं कि scripts चलें, cookies set हों, और challenge flows पूरा हों। एक raw HTTP request जो JS execute नहीं करती, इन sites पर fail हो जाएगी।
Anti-Ban Checklist
मैं असल में कोई proxy-based workflow चलाने से पहले यह verify करता हूँ:
- ✅ Quality provider से Residential IP (PixelScan/IPinfo से verified)
- ✅ Consistent, realistic User-Agent header
- ✅ Claimed browser से matching TLS fingerprint (Python fingerprint भेजकर Chrome का दावा न करें)
- ✅ Proxy के geo-location के हिसाब से matching timezone, language, और Accept-Language headers
- ✅ Realistic request timing (pages के बीच 2–10 seconds, 50ms नहीं)
- ✅ Target को ज़रूरत हो तो JavaScript rendering support
- ✅ Cookie और session handling (session के भीतर cookies preserve करें)
- ✅ Honeypot traps से बचना (hidden links, invisible form fields)
- ✅ जहाँ लागू हो वहाँ
robots.txtऔर site terms का सम्मान
Bright Data की अपनी anti-blocking documentation साफ़ तौर पर चेतावनी देती है कि “residential proxies alone” एक गलत धारणा है — modern systems IP reputation के साथ-साथ TLS fingerprints, browser fingerprints, और behavioral patterns भी check करती हैं।
आम गलतियाँ जो Residential Proxy Users को Ban कराती हैं
- Pages को बहुत तेज़ मारना। Rotating IPs के बावजूद, same provider subnet से 100 requests/second automated लगता है।
- Requests के बीच inconsistent headers। Session के बीच User-Agent बदलना, या ऐसे headers भेजना जो claimed browser से मेल न खाएँ।
- जिन sites पर monitoring होती है वहाँ
robots.txtको नज़रअंदाज़ करना। कुछ sitesrobots.txtcompliance को signal की तरह इस्तेमाल करती हैं। - Same sticky IP को बहुत देर तक इस्तेमाल करना। एक residential IP का 4 घंटे लगातार एक ही site ब्राउज़ करना असामान्य है।
- Personal account में logged-in रहकर scraping करना। Account flag हो गया तो सिर्फ session नहीं, account भी जा सकता है।
- JavaScript render न करना। कई ecommerce और social sites non-JS clients को खाली shell दिखाती हैं।
Proxy Stack छोड़ें: Thunderbit बिना Proxy Manage किए Web Scraping कैसे संभालता है
Proxy stack खड़ा करने से पहले एक ईमानदार सवाल पूछना चाहिए: क्या आपको सच में residential proxies चाहिए, या बस data चाहिए?
ऊपर बताए गए कई use cases — price monitoring, lead scraping, competitive research — में goal यह नहीं होता कि “traffic को residential IP से route करो।” Goal होता है: “इन web pages से structured data को spreadsheet में लाओ।” Residential proxy सिर्फ बड़े stack का एक हिस्सा है: proxies + headless browser + fingerprint spoofing + retry logic + CAPTCHA handling + HTML parsing + schema normalization। यह बहुत सारे moving parts हैं।
Thunderbit में हमने Open API और CLI बनाया है जो पूरी pipeline को एक ही call में संभालता है। POST /extract एक URL और schema लेता है, JavaScript render करता है, anti-bot protections handle करता है, proxy rotation internally manage करता है, CAPTCHAs solve करता है, और आपके schema के अनुसार structured JSON लौटाता है। न proxy credentials, न Puppeteer config, न fingerprint management।
Developers के लिए: API और CLI
POST /openapi/v1/distill— किसी भी page से clean, LLM-ready Markdown लौटाता हैPOST /openapi/v1/extract— schema-matched structured JSON लौटाता है- CLI:
npx @thunderbit/thunderbit-cli extract <url> --schema <json>— terminal, scripts, या CI से चलता है - Batch processing एक job में 100 URLs तक
- AI agents (Claude, Cursor) के लिए MCP server जो task के बीच web data चाहिए होने पर काम आता है
CLI documentation terminal से distill, extract, suggest-fields, और batch workflows support करती है।
Non-Technical Teams के लिए: Chrome Extension
Sales और ops teams के लिए जो code नहीं लिखते, Thunderbit Chrome Extension AI Suggest Fields के साथ 2-click scraping देती है। Extension खोलें, columns suggest करवाएँ, scrape दबाएँ, और Excel, Google Sheets, Airtable, या Notion में export करें। Proxy setup की ज़रूरत नहीं।
Residential Proxies बनाम Thunderbit कब उपयोग करें
| Scenario | Residential Proxies | Thunderbit |
|---|---|---|
| Web scraping → structured data | तब उपयोगी जब आपके पास पहले से full scraper stack हो | Strong fit: extraction, rendering, anti-bot, और structured output एक ही call में |
| Multi-account management | Raw IP/session control के लिए ज़रूरी | सही tool नहीं |
| Ad verification | Location-specific browsing के लिए ज़रूरी | Partial fit, अगर output structured data हो |
| Geo-restricted browsing | Manual location testing के लिए उपयोगी | तब fit जब localized page से data निकालना goal हो |
| Non-technical team scraping | Proxy + tool configuration चाहिए | Chrome extension और direct exports से strong fit |
मैं यह नहीं कहूँगा कि Thunderbit हर use case में residential proxies की जगह ले लेता है। 50 Amazon seller accounts manage करना या 30 cities में ad placements verify करना? आपको direct proxy access चाहिए। लेकिन अगर आपका end goal है “इस data को spreadsheet में डालना,” तो proxy stack बनाना और maintain करना शायद अनावश्यक overhead है। Thunderbit का free tier आपको बिना commitment के इसे test करने देता है।
AI-powered scraping अंदर से कैसे काम करता है, यह जानने के लिए AI web scraping और web scraping without coding पर हमारे posts देखें।
Tips और Common Pitfalls
छोटे से शुरू करें। Free trial या PAYG से test किए बिना 100GB plan न खरीदें। अपने actual target sites पर pilot चलाएँ और success rate, speed, और geo-accuracy मापें।
सिर्फ IP नहीं, success rate track करें। 95% success rate अच्छा लगता है, जब तक यह न पता चले कि 5% failures वही pages हैं जो सबसे ज़्यादा मायने रखते हैं। Aggregate नहीं, target site के हिसाब से block rates track करें।
User-Agents को realistic तरीके से rotate करें। 3–5 current browser strings चुनें और उन्हीं पर टिके रहें। 500 random User-Agents की सूची उल्टा नुकसान कर सकती है — variety से consistency ज़्यादा महत्वपूर्ण है।
Retries के लिए budget रखें। मेरे अनुभव में real-world bandwidth consumption naive page-size calculation से 2–5x तक होती है।
Provider की IP sourcing जाँचें। अगर provider यह नहीं बता सकता कि IPs कहाँ से आते हैं, तो यह red flag है। FBI advisory और Google IPIDEA disruption याद दिलाते हैं कि unethical sourcing असली risk पैदा करती है।
Session strategy को नज़रअंदाज़ न करें। Login flow के लिए rotating sessions इस्तेमाल करेंगे तो हर बार टूटेगा। Broad price monitoring के लिए sticky sessions इस्तेमाल करने से पैसा बर्बाद होगा और detection risk बढ़ेगा।
Geo-accuracy independently test करें। Provider dashboards कह सकते हैं “New York.” Target site शायद “Newark” या “somewhere in New Jersey” देख रही हो। कई geolocation databases और target द्वारा serve किए गए content से verify करें।
Key Takeaways
- Residential proxies consumer ISP IPs के जरिए traffic route करते हैं, जिससे आपकी requests normal home browsing जैसी लगती हैं। जब targets actively datacenter traffic block करते हैं, तब यह सही विकल्प है।
- Provider selection pool size से ज़्यादा महत्वपूर्ण है। सिर्फ headline number नहीं — IP freshness, subnet diversity, geo-accuracy, ethical sourcing, session flexibility, और billing model evaluate करें।
- Billing models बहुत अलग होते हैं। Per-GB, per-IP, per-request, और PAYG की cost profiles अलग हैं। Commitment से पहले real bandwidth (retries और rendering overhead सहित) का अंदाज़ा लगाएँ।
- Sticky बनाम rotating एक configuration decision है, preference नहीं। Task के अनुसार session type चुनें: continuity के लिए sticky, distribution के लिए rotating।
- Residential IP सिर्फ कई layers में से एक है। TLS fingerprints, header consistency, browser fingerprints, request timing, और JavaScript rendering सब मायने रखते हैं। इनमें से किसी को भी ignore किया तो IP quality चाहे जैसी हो, ban मिल सकता है।
- Web scraping के लिए, पहले सोचें कि क्या आपको proxy की ज़रूरत भी है। Thunderbit की API और Chrome extension पूरी anti-detection pipeline को internally handle करती हैं और proxy management के बिना structured data लौटाती हैं। ecommerce, sales, और lead generation scraping में यह setup और maintenance समय काफी बचा सकती हैं।
Ready to test? Thunderbit scraping के लिए free tier देता है, और अगर direct IP access की ज़रूरत हो तो ऊपर दिया provider evaluation checklist इस्तेमाल करके confidence के साथ residential proxy चुन सकते हैं।
FAQs
1. क्या residential proxies का इस्तेमाल legal है?
हाँ, ज़्यादातर jurisdictions में proxies खुद legal हैं। Legality इस बात पर निर्भर करती है कि आप उनसे क्या करते हैं: website terms of service, data protection laws (GDPR, CCPA) का पालन, और fraud या unauthorized access में शामिल न होना। Provider की IP sourcing भी महत्वपूर्ण है — botnets या बिना user consent वाले proxies खरीदार के लिए भी legal risk बनाते हैं, सिर्फ provider के लिए नहीं।
2. Residential proxies और ISP (static residential) proxies में क्या फर्क है?
ISP proxies ऐसे datacenter-hosted IPs होते हैं जो consumer ISPs के under registered होते हैं। ये P2P residential proxies से तेज़ और ज़्यादा stable होते हैं, लेकिन pools छोटे होते हैं और समय के साथ IPs को fingerprint करना आसान हो सकता है। Account management workflows के लिए यह अच्छा middle ground है, जहाँ P2P pools की variability के बिना residential-looking IP चाहिए।
3. 2026 में residential proxies की कीमत कितनी होती है?
Typical per-GB rates लगभग USD 2/GB (high-volume enterprise plans) से USD 7+/GB (छोटे PAYG plans) तक होती हैं। AI Multiple का अनुमान provider और volume के आधार पर USD 3–15/GB बताता है। असली लागत आपके billing model, bandwidth consumption (retries और rendering सहित), और PAYG या subscription with unused quota पर निर्भर करती है।
4. क्या मैं residential proxies free में इस्तेमाल कर सकता हूँ?
कुछ providers सीमित bandwidth या IP access के साथ free tiers या trials देते हैं। ये testing के लिए उपयोगी हैं, लेकिन आम तौर पर pools छोटे, speeds धीमी, और IPs पहले से बहुत इस्तेमाल की हुई हो सकती हैं। किसी भी production workflow के लिए भुगतान की उम्मीद रखें। Free tier validation के लिए है, volume के लिए नहीं।
5. मुझे कितने residential proxy IPs चाहिए?
यह आपके volume और rotation strategy पर निर्भर करता है। Broad scraping with rotating sessions के लिए आपको पहले से IP चुनने की ज़रूरत नहीं होती — provider pool rotation संभालता है। Sticky sessions (account management, login flows) के लिए हर concurrent session पर एक stable IP चाहिए। Rough rule: अगर आप 10 accounts एक साथ manage कर रहे हैं, तो 10 sticky IPs चाहिए। अगर आप rotating sessions के साथ 10,000 pages scrape कर रहे हैं, तो pool size किसी specific IP count से ज़्यादा महत्वपूर्ण है — अपने target geography में बड़े, fresh pools वाले providers देखें।
Learn More