
If you’ve ever tried to grab data from a website that loads content as you scroll, hides prices behind a login, or seems to change its layout every other week, you know the struggle is real. Static scrapers just don’t cut it anymore. In fact, over now rely on web scraping for alternative data, and automate competitor price monitoring. But here’s the kicker: much of that data lives on dynamic sites, loaded by JavaScript and hidden behind user interactions. That’s where headless browser automation—and tools like Puppeteer—come in.
As someone who’s spent years building automation and AI tools (and, yes, scraping my fair share of websites for sales and ops teams), I’ve seen firsthand how Puppeteer can unlock data that traditional scrapers miss. But I’ve also seen how the coding overhead can be a dealbreaker for business users. So in this guide, I’ll walk you through exactly what Puppeteer scraper is, how to use it for web scraping, and when you might want to reach for something even simpler—like , our AI-powered, no-code web scraper.
What is Puppeteer Scraper? A Quick Overview
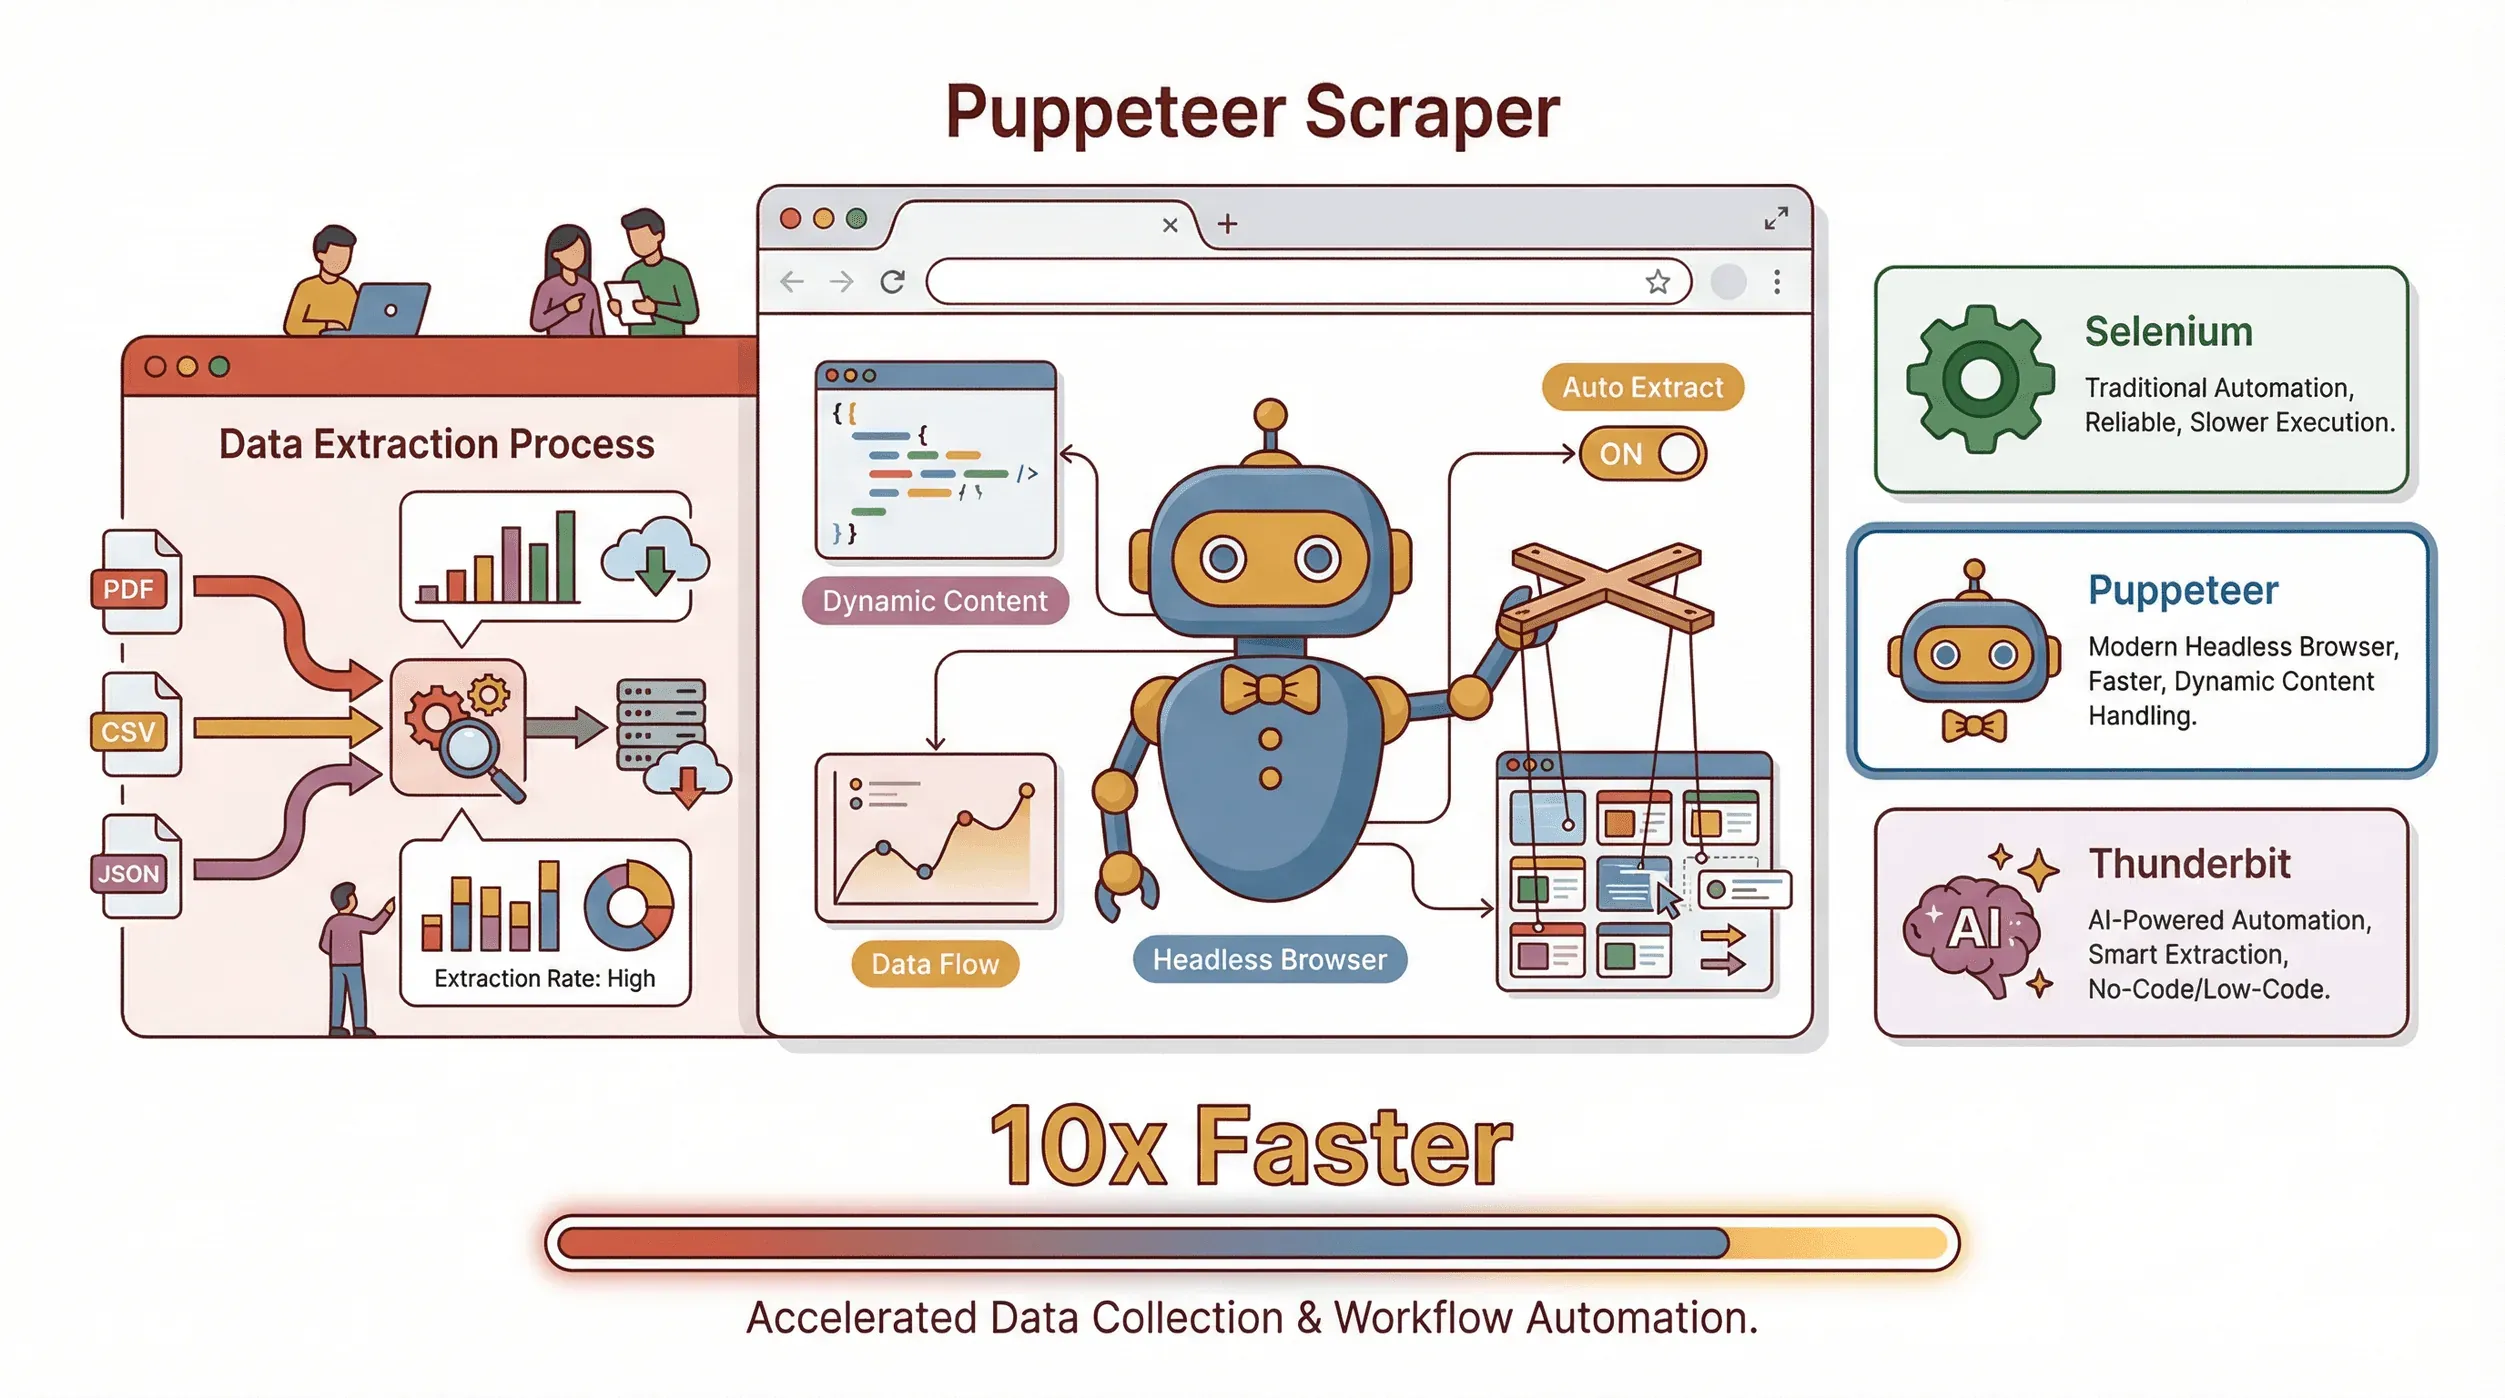 Let’s start with the basics. is an open-source Node.js library from Google that lets you control a headless Chrome or Chromium browser using JavaScript. In plain English: it’s like having a robot that can open web pages, click buttons, fill out forms, scroll, and—most importantly—extract data, all without showing anything on your screen.
What makes Puppeteer special?
- It can render dynamic content—meaning it waits for JavaScript to load, just like a real user.
- It can simulate user actions: clicking, typing, scrolling, and even handling pop-ups.
- It’s perfect for scraping sites where the data only appears after interaction, like e-commerce listings, social feeds, or dashboards.
How does it compare to other tools?
- Selenium: The OG of browser automation. Works with many browsers and languages, but is bulkier and a bit more old-school. Great for cross-browser testing, but Puppeteer is snappier for Chrome/Node.js projects.
- Thunderbit: This is where I get excited. Thunderbit is a no-code, AI-powered web scraper that sits in your browser. Instead of writing scripts, you just click “AI Suggest Fields” and let the AI figure out what to extract. It’s perfect for business users who want results without code (more on this later).
In short: Puppeteer = maximum control (if you code). Thunderbit = maximum convenience (if you don’t want to code).
Why Puppeteer Web Scraping Matters for Business Users
Let’s get real: web scraping isn’t just for hackers or data scientists anymore. Sales, operations, marketing, and even real estate teams are using web data to get ahead. And with so much business-critical info locked behind dynamic sites, Puppeteer is often the key to unlocking it.
Here are some real-world use cases:
| Use Case | Who Benefits | Impact / ROI |
|---|---|---|
| Lead generation | Sales, Biz Dev | Automate prospect list building; save 8+ hours/week per rep (case study) |
| Price monitoring | E-commerce, Product Ops | Real-time competitor tracking; one enterprise saved $3.8M/year (source) |
| Market research | Marketing, Strategy, Finance | 67% of investment advisors use web-scraped data; up to 890% ROI in some cases (source) |
| Real estate aggregation | Agents, Analysts | Scrape 50+ property pages in minutes, not hours (source) |
| Compliance tracking | Ops, Legal | Automate monitoring; one insurer avoided $50M in penalties (source) |
And let’s not forget: spend a quarter of their week on repetitive tasks like data collection. Automating this with web scraping isn’t just a nice-to-have—it’s a competitive advantage.
Getting Started: Setting Up Your Puppeteer Scraper
Ready to roll up your sleeves? Here’s how to get Puppeteer running in under 10 minutes (assuming you’re comfortable with a little JavaScript):
1. Install Node.js
Puppeteer runs on Node.js. Download the latest LTS version from .
2. Create a new project folder
Open your terminal and run:
1mkdir puppeteer-scraper-demo
2cd puppeteer-scraper-demo
3npm init -y
3. Install Puppeteer
1npm install puppeteerThis will also download a compatible version of Chromium (about 100MB).
4. Create your first script
Make a file called scrape.js:
1const puppeteer = require('puppeteer');
2(async () => {
3  const browser = await puppeteer.launch();
4  const page = await browser.newPage();
5  await page.goto('https://example.com', { waitUntil: 'domcontentloaded' });
6  const title = await page.title();
7  console.log('Page title:', title);
8  await browser.close();
9})();
Run it with:
1node scrape.jsIf you see “Page title: Example Domain,” congrats—you’ve just automated Chrome!
Building Your First Puppeteer Web Scraping Script
Let’s get practical. Suppose you want to scrape quotes from (a demo site for scrapers).
Step 1: Navigate to the page
1await page.goto('http://quotes.toscrape.com', { waitUntil: 'networkidle0' });Step 2: Extract data
1const quotes = await page.evaluate(() => {
2  return Array.from(document.querySelectorAll('.quote')).map(node => ({
3    text: node.querySelector('.text')?.innerText.trim(),
4    author: node.querySelector('.author')?.innerText.trim(),
5    tags: Array.from(node.querySelectorAll('.tag')).map(tag => tag.innerText.trim())
6  }));
7});
8console.log(quotes);
Step 3: Handle pagination
1let hasNext = true;
2let allQuotes = [];
3while (hasNext) {
4  // Extract quotes as above
5  const quotes = await page.evaluate(/* ... */);
6  allQuotes.push(...quotes);
7  const nextButton = await page.$('li.next > a');
8  if (nextButton) {
9    await Promise.all([
10      page.click('li.next > a'),
11      page.waitForNavigation({ waitUntil: 'networkidle0' })
12    ]);
13  } else {
14    hasNext = false;
15  }
16}
Step 4: Save to JSON
1const fs = require('fs');
2fs.writeFileSync('quotes.json', JSON.stringify(allQuotes, null, 2));
And there you go—a basic Puppeteer scraper that navigates, extracts, paginates, and saves data.
Advanced Puppeteer Scraper Techniques: Handling Dynamic Content
Most real-world sites aren’t as simple as a static list. Here’s how to tackle the tough stuff:
1. Waiting for dynamic elements
1await page.waitForSelector('.product-list-item');This ensures the content you want is loaded before you try to grab it.
2. Simulating user actions
- Click a button:
await page.click('#load-more'); - Type into a field:
await page.type('#search', 'laptop'); - Scroll for infinite scroll:
1// Note: page.waitForTimeout was removed in Puppeteer v22. Use a plain promise instead.
2const sleep = (ms) => new Promise(r => setTimeout(r, ms));
3let previousHeight = await page.evaluate('document.body.scrollHeight');
4while (true) {
5  await page.evaluate('window.scrollTo(0, document.body.scrollHeight)');
6  await sleep(1500);
7  const newHeight = await page.evaluate('document.body.scrollHeight');
8  if (newHeight === previousHeight) break;
9  previousHeight = newHeight;
10}
1**3. Handling logins**
2```javascript
3await page.goto('https://exampleshop.com/login');
4await page.type('#login-username', 'myusername');
5await page.type('#login-password', 'mypassword');
6await page.click('#login-button');
7await page.waitForNavigation({ waitUntil: 'networkidle0' });
4. Dealing with AJAX-loaded data Sometimes the data isn’t in the DOM but comes from an API call. You can intercept network responses with:
1page.on('response', async response => {
2  if (response.url().includes('/api/products')) {
3    const data = await response.json();
4    // Process data
5  }
6});
Real-World Example: Scraping Product Data from an E-commerce Site
Let’s put it all together. Imagine you want to scrape product names, prices, and images from a (demo) e-commerce site after logging in.
1const puppeteer = require('puppeteer');
2const fs = require('fs');
3(async () => {
4  const browser = await puppeteer.launch({ headless: true });
5  const page = await browser.newPage();
6  // Step 1: Log in
7  await page.goto('https://exampleshop.com/login');
8  await page.type('#login-username', 'myusername');
9  await page.type('#login-password', 'mypassword');
10  await page.click('#login-button');
11  await page.waitForNavigation({ waitUntil: 'networkidle0' });
12  // Step 2: Go to category page
13  await page.goto('https://exampleshop.com/category/laptops', { waitUntil: 'networkidle0' });
14  // Step 3: Extract products
15  const products = await page.evaluate(() => {
16    return Array.from(document.querySelectorAll('.product-item')).map(item => ({
17      name: item.querySelector('.product-title')?.innerText.trim() || '',
18      price: item.querySelector('.product-price')?.innerText.trim() || '',
19      image: item.querySelector('img.product-image')?.src || ''
20    }));
21  });
22  // Step 4: Save to JSON
23  fs.writeFileSync('products.json', JSON.stringify(products, null, 2));
24  await browser.close();
25})();
This script logs in, navigates, scrapes, and saves—all automatically. For more advanced needs, you can add loops for pagination or even click into each product for more details.
Thunderbit: Making Puppeteer Scraper Simpler with AI
Now, if you’ve made it this far and you’re thinking, “That’s cool, but I don’t want to write code every time I need a new dataset,” you’re not alone. That’s exactly why we built .
What makes Thunderbit different?
- No code required: Just install the , open the page you want to scrape, and click “AI Suggest Fields.”
- AI-powered field detection: Thunderbit reads the page and suggests the best columns to extract—like “Product Name,” “Price,” “Image,” etc.
- Handles dynamic content: Infinite scroll, pop-ups, and subpages? Thunderbit’s AI can handle it, clicking through pagination or even visiting each product’s detail page to enrich your data.
- Instant export: Send your data straight to Excel, Google Sheets, Notion, or Airtable with one click. No extra charge for exports.
- Templates for popular sites: Need to scrape Amazon, Zillow, or LinkedIn? Thunderbit has instant templates—no setup needed.
- Cloud or browser scraping: For big jobs, Thunderbit can scrape up to 50 pages at once in the cloud.
I’ve watched users go from “I wish I could get this data” to “Here’s my spreadsheet” in under five minutes. And the best part? No more worrying about scripts breaking when the website changes—Thunderbit’s AI adapts on the fly.
Puppeteer vs. Thunderbit: Choosing the Right Web Scraping Tool
So, which should you use? Here’s how I break it down for teams:
| Factor | Puppeteer (Code) | Thunderbit (No-Code, AI) |
|---|---|---|
| Ease of Use | Requires JavaScript and DOM knowledge | Point-and-click, AI suggests fields |
| Setup Speed | Hours to days for complex tasks | Minutes—just install and go |
| Control/Flexibility | Maximum: script any custom logic, integrate with other code | High for standard cases; less suited for highly custom workflows |
| Dynamic Content | Manual scripting for waits, clicks, scrolls | Built-in AI handles dynamic content, pagination, and subpages automatically |
| Maintenance | You own the scripts—update when sites change | AI adapts to layout changes; less maintenance for the user |
| Data Export | Write your own export logic | One-click export to Excel, Sheets, Notion, Airtable, CSV, JSON |
| Best For | Developers, highly customized or large-scale scrapes | Business users, quick-turnaround projects, non-technical teams |
| Cost | Free (except your time and any infra) | Free tier available; paid plans by credits (see Thunderbit Pricing) |
Bottom line:
- Use Puppeteer if you need total control, have coding resources, or need to integrate scraping into a larger app.
- Use Thunderbit if you want results fast, don’t want to code, or need to empower non-technical teammates.
Honestly, I’ve seen teams use both: Thunderbit for quick wins and prototyping, Puppeteer for deep integrations or edge cases.
Step-by-Step Checklist: Running a Successful Puppeteer Web Scraping Project
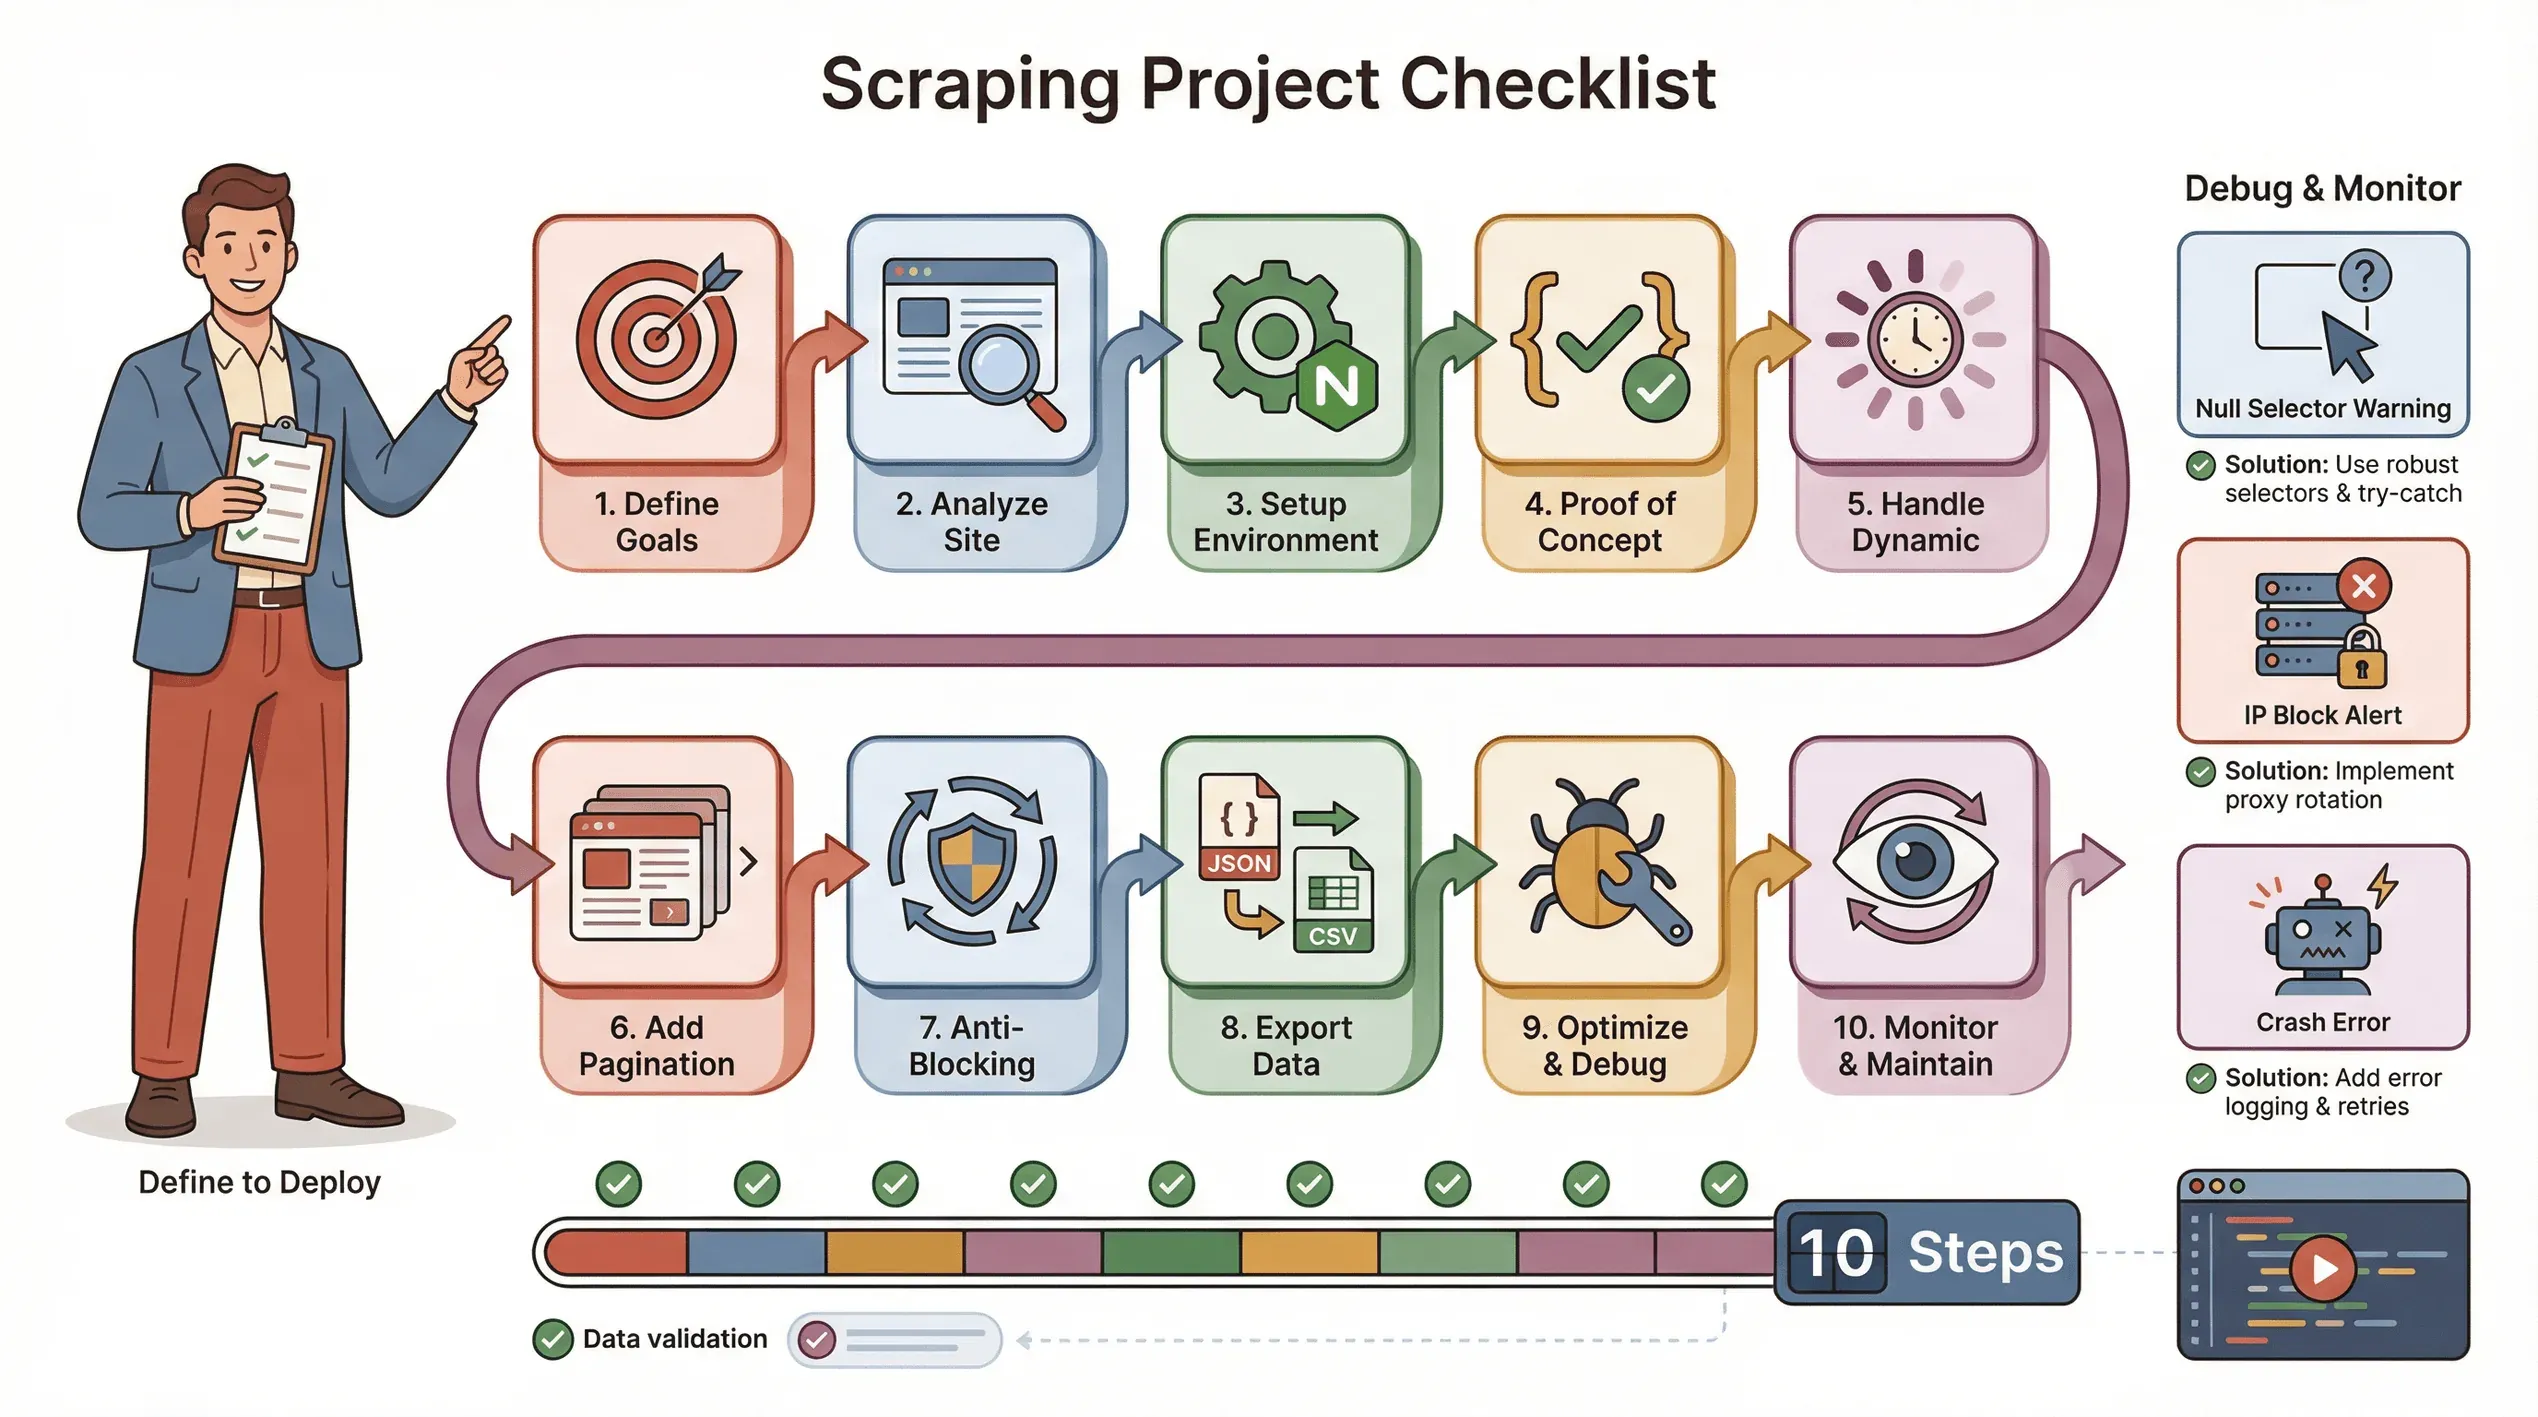 Here’s my go-to checklist for a smooth Puppeteer scraping project:
- Define your goals: What data do you need? Where does it live?
- Analyze the site: Is it dynamic? Does it need login? Are there anti-bot measures?
- Set up your environment: Node.js, Puppeteer, and any helper libraries.
- Write a proof-of-concept: Start with one page, get the selectors right.
- Handle dynamic content: Use
waitForSelector, simulate clicks/scrolls as needed. - Add pagination or loops: Scrape all pages, not just one.
- Implement anti-blocking tactics: Randomize delays, set a real User-Agent, use proxies if needed.
- Export and validate data: Save to JSON/CSV, check for completeness.
- Optimize and error-handle: Add try/catch, log progress, handle missing data gracefully.
- Monitor and maintain: Sites change—be ready to update your script.
Troubleshooting tips:
- If selectors return null, double-check the HTML and use waits.
- If you get blocked, slow down, rotate IPs, or use stealth plugins.
- If your script crashes, check for memory leaks or unhandled exceptions.
Conclusion & Key Takeaways
Web scraping has become a must-have skill for data-driven teams. Puppeteer gives you the power to extract data from even the most dynamic, JavaScript-heavy sites—but it does require some coding chops and ongoing maintenance. For business users who want to skip the code and get straight to the data, Thunderbit offers an AI-powered, no-code alternative that’s fast, flexible, and surprisingly robust.
Here’s what I’d recommend:
- If you’re technical and need deep customization, start with Puppeteer.
- If you want speed, simplicity, and less maintenance, give a spin (the is a great place to start).
- For most teams, a mix of both will cover 99% of your web data needs.
Want to see more guides like this? Check out the for tutorials, comparisons, and the latest in AI-powered web scraping.
FAQs
1. What is Puppeteer scraper and why is it used for web scraping?
Puppeteer is a Node.js library that lets you control a headless Chrome browser with JavaScript. It’s used for web scraping because it can load dynamic content, simulate user actions, and extract data from sites that traditional scrapers can’t handle.
2. How does Puppeteer compare to Selenium and Thunderbit?
Selenium works with multiple browsers and languages but is bulkier. Puppeteer is streamlined for Chrome/Node.js and is faster for many scraping tasks. Thunderbit, on the other hand, is a no-code, AI-powered tool that lets non-technical users scrape data with just a few clicks.
3. What are the main business benefits of Puppeteer web scraping?
Automating data collection saves time, reduces errors, and enables real-time insights for sales, marketing, operations, and more. Use cases range from lead generation to price monitoring and market research.
4. What are the biggest challenges with Puppeteer scraping?
The main challenges are handling dynamic content, avoiding anti-bot blocks, and maintaining scripts when websites change. You’ll need to write code to manage waits, simulate interactions, and handle errors.
5. When should I use Thunderbit instead of Puppeteer?
Use Thunderbit if you want to skip coding, need results fast, or want to empower non-technical teammates. It’s ideal for standard scraping tasks, quick-turnaround projects, or when you just want to export data to Excel or Google Sheets with minimal fuss.
Ready to try a smarter way to scrape? or dive deeper with more guides on the . Happy scraping!
Learn More