
There’s a certain thrill in spinning up a new AI agent like OpenClaw—until you realize that, in 2026, “just install and go” is a recipe for disaster. I’ve seen teams go from excited to panicked in a single afternoon, all because their OpenClaw instance was a little too open for comfort. The reality? OpenClaw is one of the most powerful automation platforms out there, but with great power comes a giant, blinking “SECURITY RISK” sign if you skip the basics.
This isn’t just theoretical. In the past year, we’ve watched OpenClaw’s adoption skyrocket—over 338,000 GitHub stars and 66,200 forks ()—and with that popularity came a wave of real-world attacks, exposed instances, and high-profile vulnerabilities (). So, before you hand your AI agent the keys to your digital kingdom, let’s walk through a security-first installation that keeps your business safe, your data private, and your weekends free from frantic incident response calls.
I’ll break down the latest OpenClaw security architecture, share practical hardening steps, and show you how tools like can help you monitor and maintain your installation—without giving AI full shell access (yet). Ready? Let’s lock things down.
Understanding OpenClaw’s Security Landscape in 2026
OpenClaw is a tool-using AI agent platform—think of it as an AI “robot” that can browse the web, run shell commands, automate workflows, and even install plugins. That flexibility is exactly why it’s so powerful for sales, operations, and IT teams. But it’s also why OpenClaw deployments are uniquely sensitive to security missteps.
The 2026 Security Architecture: What’s New?
OpenClaw’s latest releases have made big strides in security. The platform now includes:
- Enhanced encryption for all gateway communications, with support for modern protocols and stronger cipher suites ().
- SecretRefs for API keys and credentials, so you’re not leaving secrets in plaintext config files ().
- Exec approvals and allowlists, letting you tightly control which commands the agent can run—and requiring explicit approval for anything outside that list ().
- Sandboxing improvements that isolate tool execution, especially in Docker and VM environments ().
But here’s the catch: these features are only as strong as your configuration. The default install can still be risky if you don’t lock it down.
Why AI Agents with Shell Access Are High-Risk
 Let’s get real: giving an AI agent shell access is like letting a toddler loose in a server room—with a box of matches. In 2026, the biggest risks include:
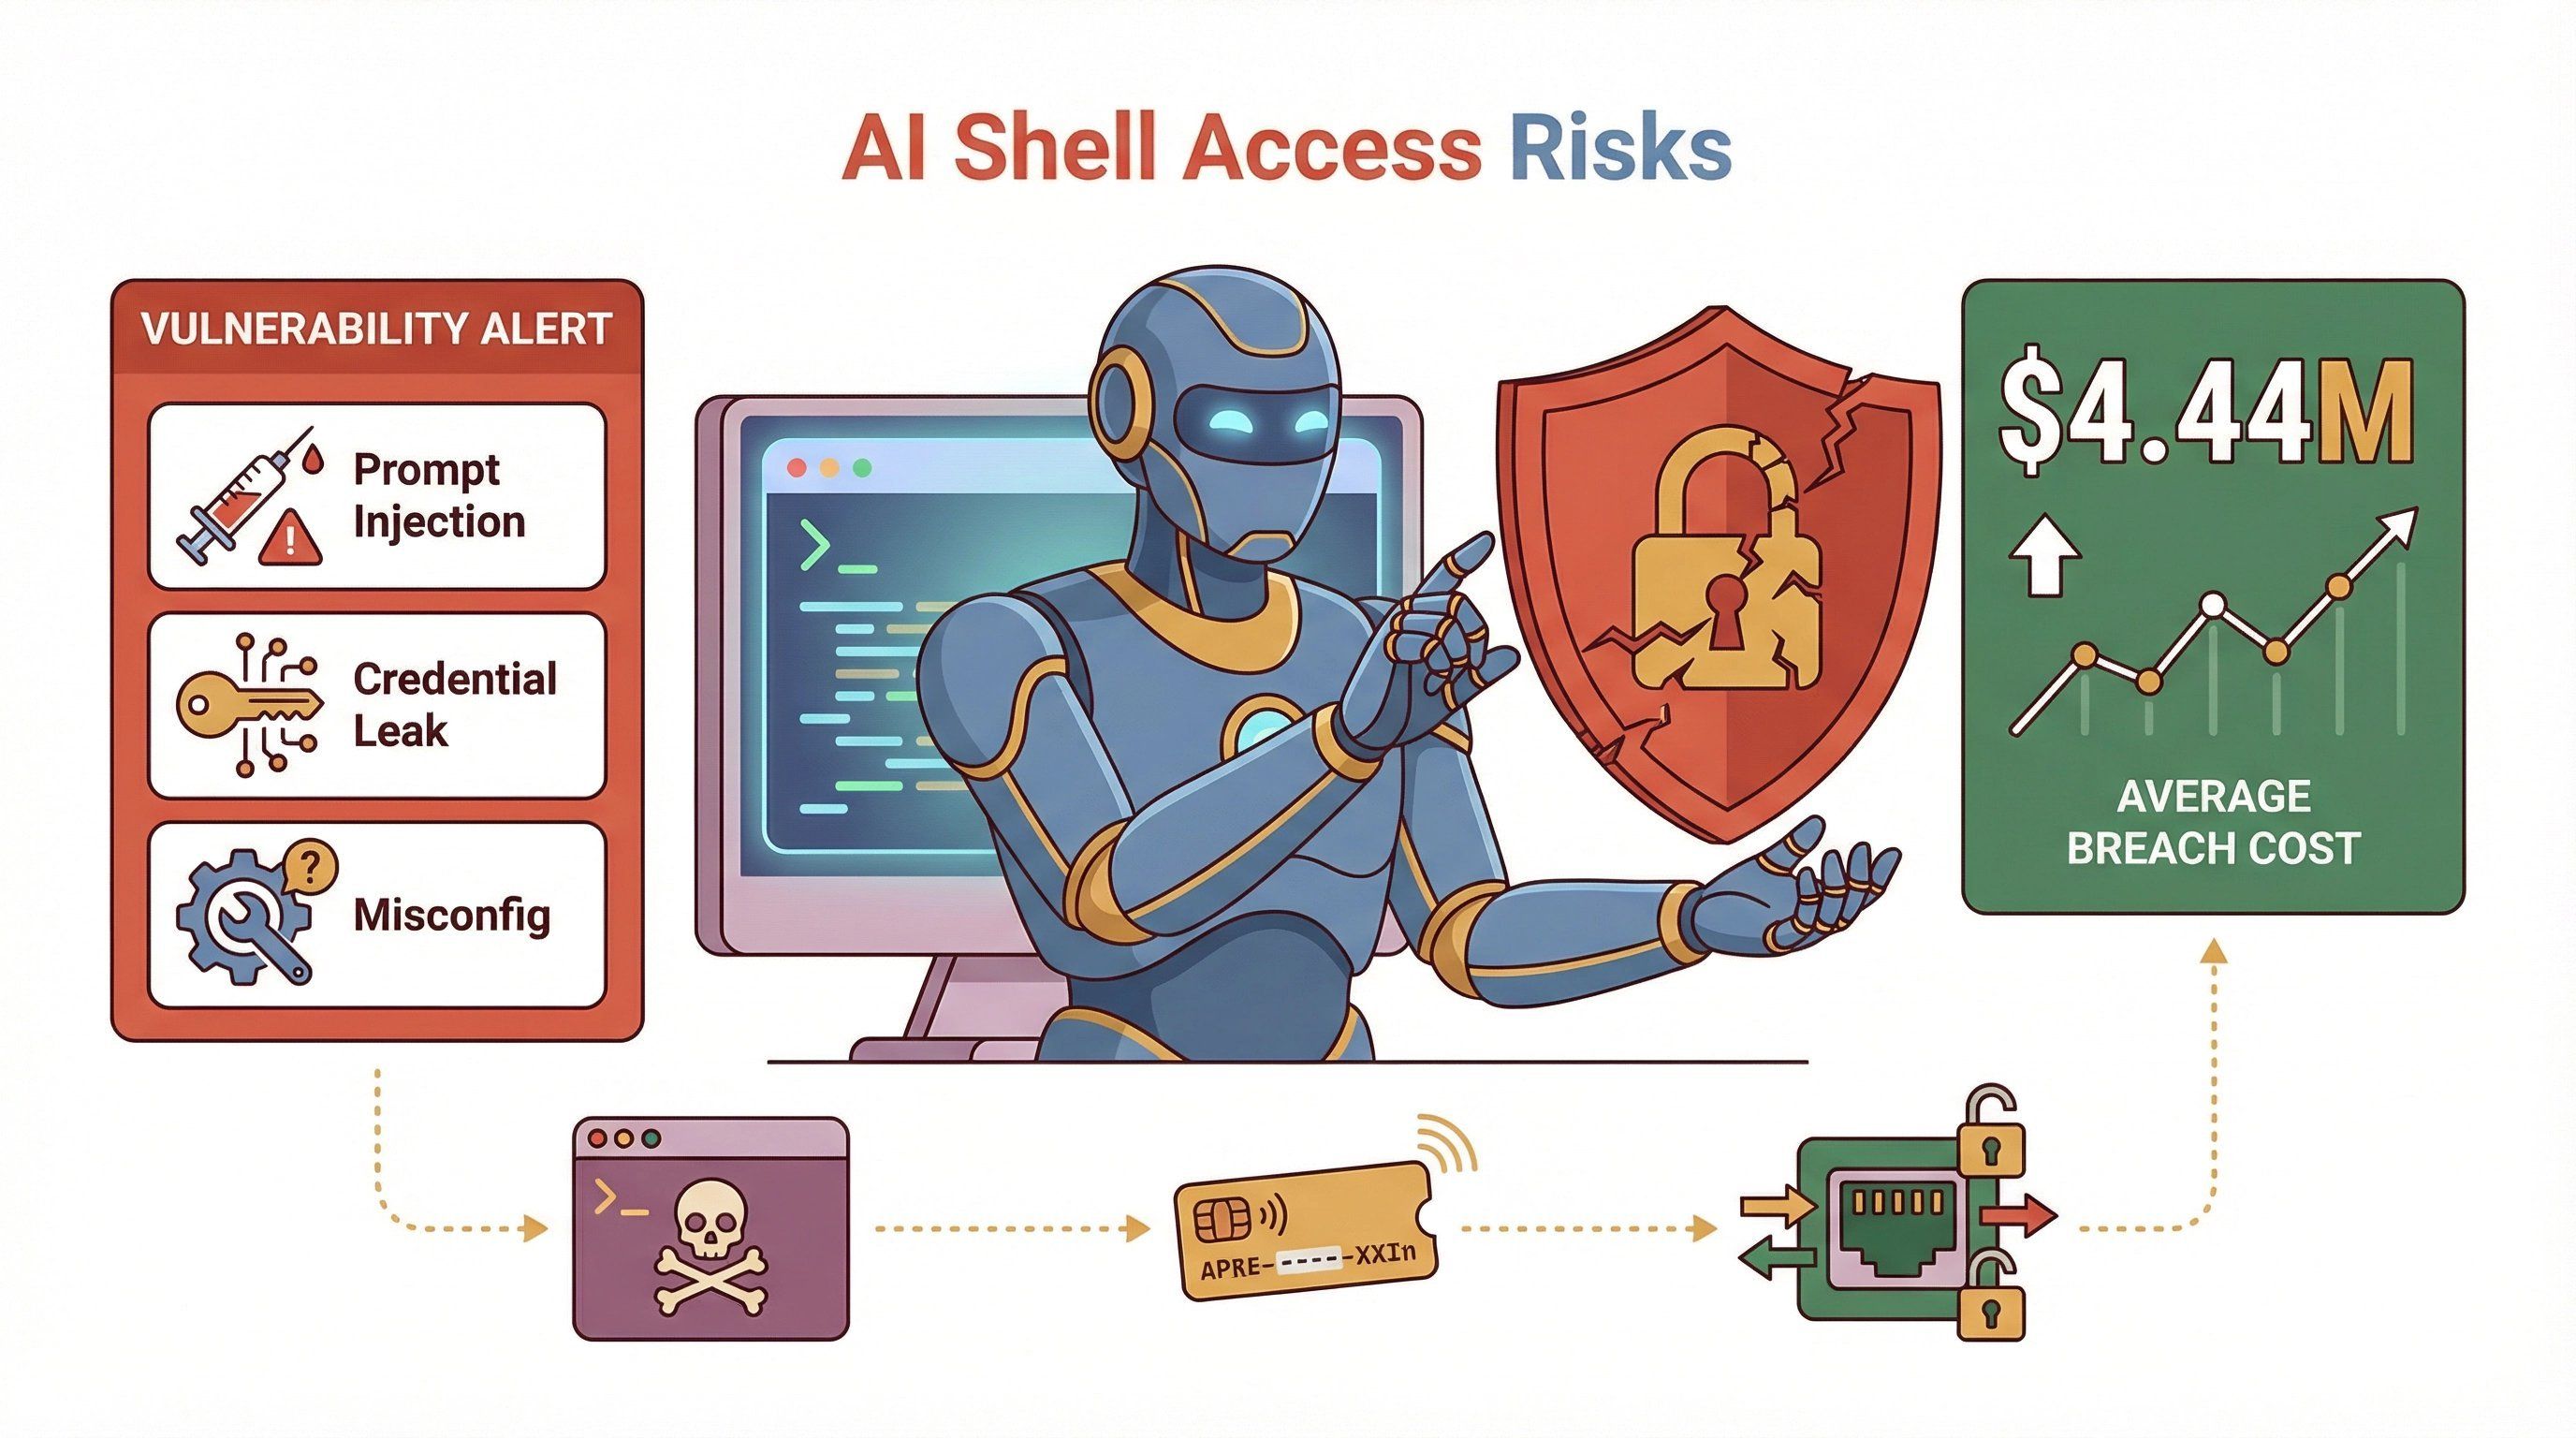
- Prompt injection attacks: Malicious input (from web pages, emails, or even Slack messages) can trick the agent into running dangerous commands ().
- Credential leaks: Exposed configs or logs can spill API keys, tokens, or even cloud credentials ().
- Misconfiguration: A single open port or weak password can turn your OpenClaw instance into a public playground for attackers ().
Recent CVEs tell the story: in early 2026, OpenClaw patched a command injection flaw in Docker sandboxing (), a WebSocket token leak (), and a plugin path traversal bug (). Each one could escalate from “weird output” to “full system compromise” if left unpatched.
Why Security-First Installation Matters for OpenClaw
Let’s put it bluntly: an insecure OpenClaw install isn’t just a technical risk—it’s a business risk. The average cost of a data breach in 2025 was $4.44 million (), and AI agent incidents can go undetected for months (mean time to identify + contain: 241 days).
Power vs. Risk: Real-World Use Cases
Here’s a look at how OpenClaw can be both a superpower and a liability:
| Use Case | Business Value | Security Risk if Misconfigured |
|---|---|---|
| Sales automation | Scrape leads, auto-email, CRM sync | Exposed tokens, mass email abuse |
| IT operations | Auto-patch, monitor, restart apps | Shell access = potential RCE |
| Data analysis | Summarize docs, ingest web data | Prompt injection, data exfiltration |
| Plugin ecosystem | Extend with new tools | Supply chain attacks, plugin exploits |
The difference between “helpful AI” and “security nightmare” is all in the setup.
Cloud AI vs. Self-Hosted Agents: Who’s Responsible?
With cloud AI services, the provider manages most of the security. With self-hosted OpenClaw, you are the security team. That means:
- You control the network exposure (public, private, or tailnet-only).
- You manage secrets, updates, and plugin vetting.
- You’re on the hook if things go sideways.
If that sounds daunting, don’t worry—I’ll walk you through how to do it right.
Pre-Installation Security Checklist: Laying the Groundwork
Before you even run openclaw install, let’s get your house in order. Here’s my go-to checklist for hardening your environment:
1. Update Your OS and Packages
- Patch your server or VM to the latest stable release.
- Update all system packages, especially Docker, Python, and Node.js if you’ll be using them.
2. Disable Unnecessary Services and Ports
- Turn off any services you don’t need (FTP, telnet, etc.).
- Close all unused ports—OpenClaw should only listen where you intend.
3. Enable and Configure Firewalls
- Use
ufworfirewalldto restrict inbound and outbound traffic. - Only allow trusted IPs or your tailnet.
4. Principle of Least Privilege
- Create a dedicated user account for OpenClaw—never run as root.
- Limit file and directory permissions to only what’s needed.
5. Harden SSH and Remote Access
- Disable password login; use SSH keys.
- Change the default SSH port and set up fail2ban for brute-force protection.
6. Prepare for Secrets Management
- Set up environment variables or a secrets manager (HashiCorp Vault, AWS Secrets Manager, etc.).
- Never store API keys or credentials in plaintext files.
7. Audit Before You Begin
- Run a baseline security scan (
lynis,clamav, or your favorite tool). - Document your initial state—trust me, you’ll thank yourself later.
Pro tip: If you’re using , you can scrape and summarize your system logs or firewall configs to double-check for open ports or risky settings before you install anything.
OpenClaw Secure Installation Steps: A Practical Walkthrough
Let’s get hands-on. Here’s how I recommend installing OpenClaw with security as the top priority.
1. Choose Your Isolation: Docker, VM, or Bare Metal?
| Method | Pros | Cons |
|---|---|---|
| Docker | Easy packaging, quick resets, non-root by default | Networking can expose ports if misconfigured; beware of root-in-container issues (docs.openclaw.ai) |
| Dedicated VM | Strong isolation, easy to snapshot/rollback | More overhead, still needs secrets hygiene |
| Bare Metal | Fastest, lowest friction | Highest risk—mixes agent and personal data, big blast radius |
My advice: For most teams, Docker or a dedicated VM is the sweet spot. If you must use bare metal, be extra careful with permissions and secrets.
2. Download and Verify OpenClaw
- Always pull from the official repo or registry ().
- Verify checksums or signatures if available.
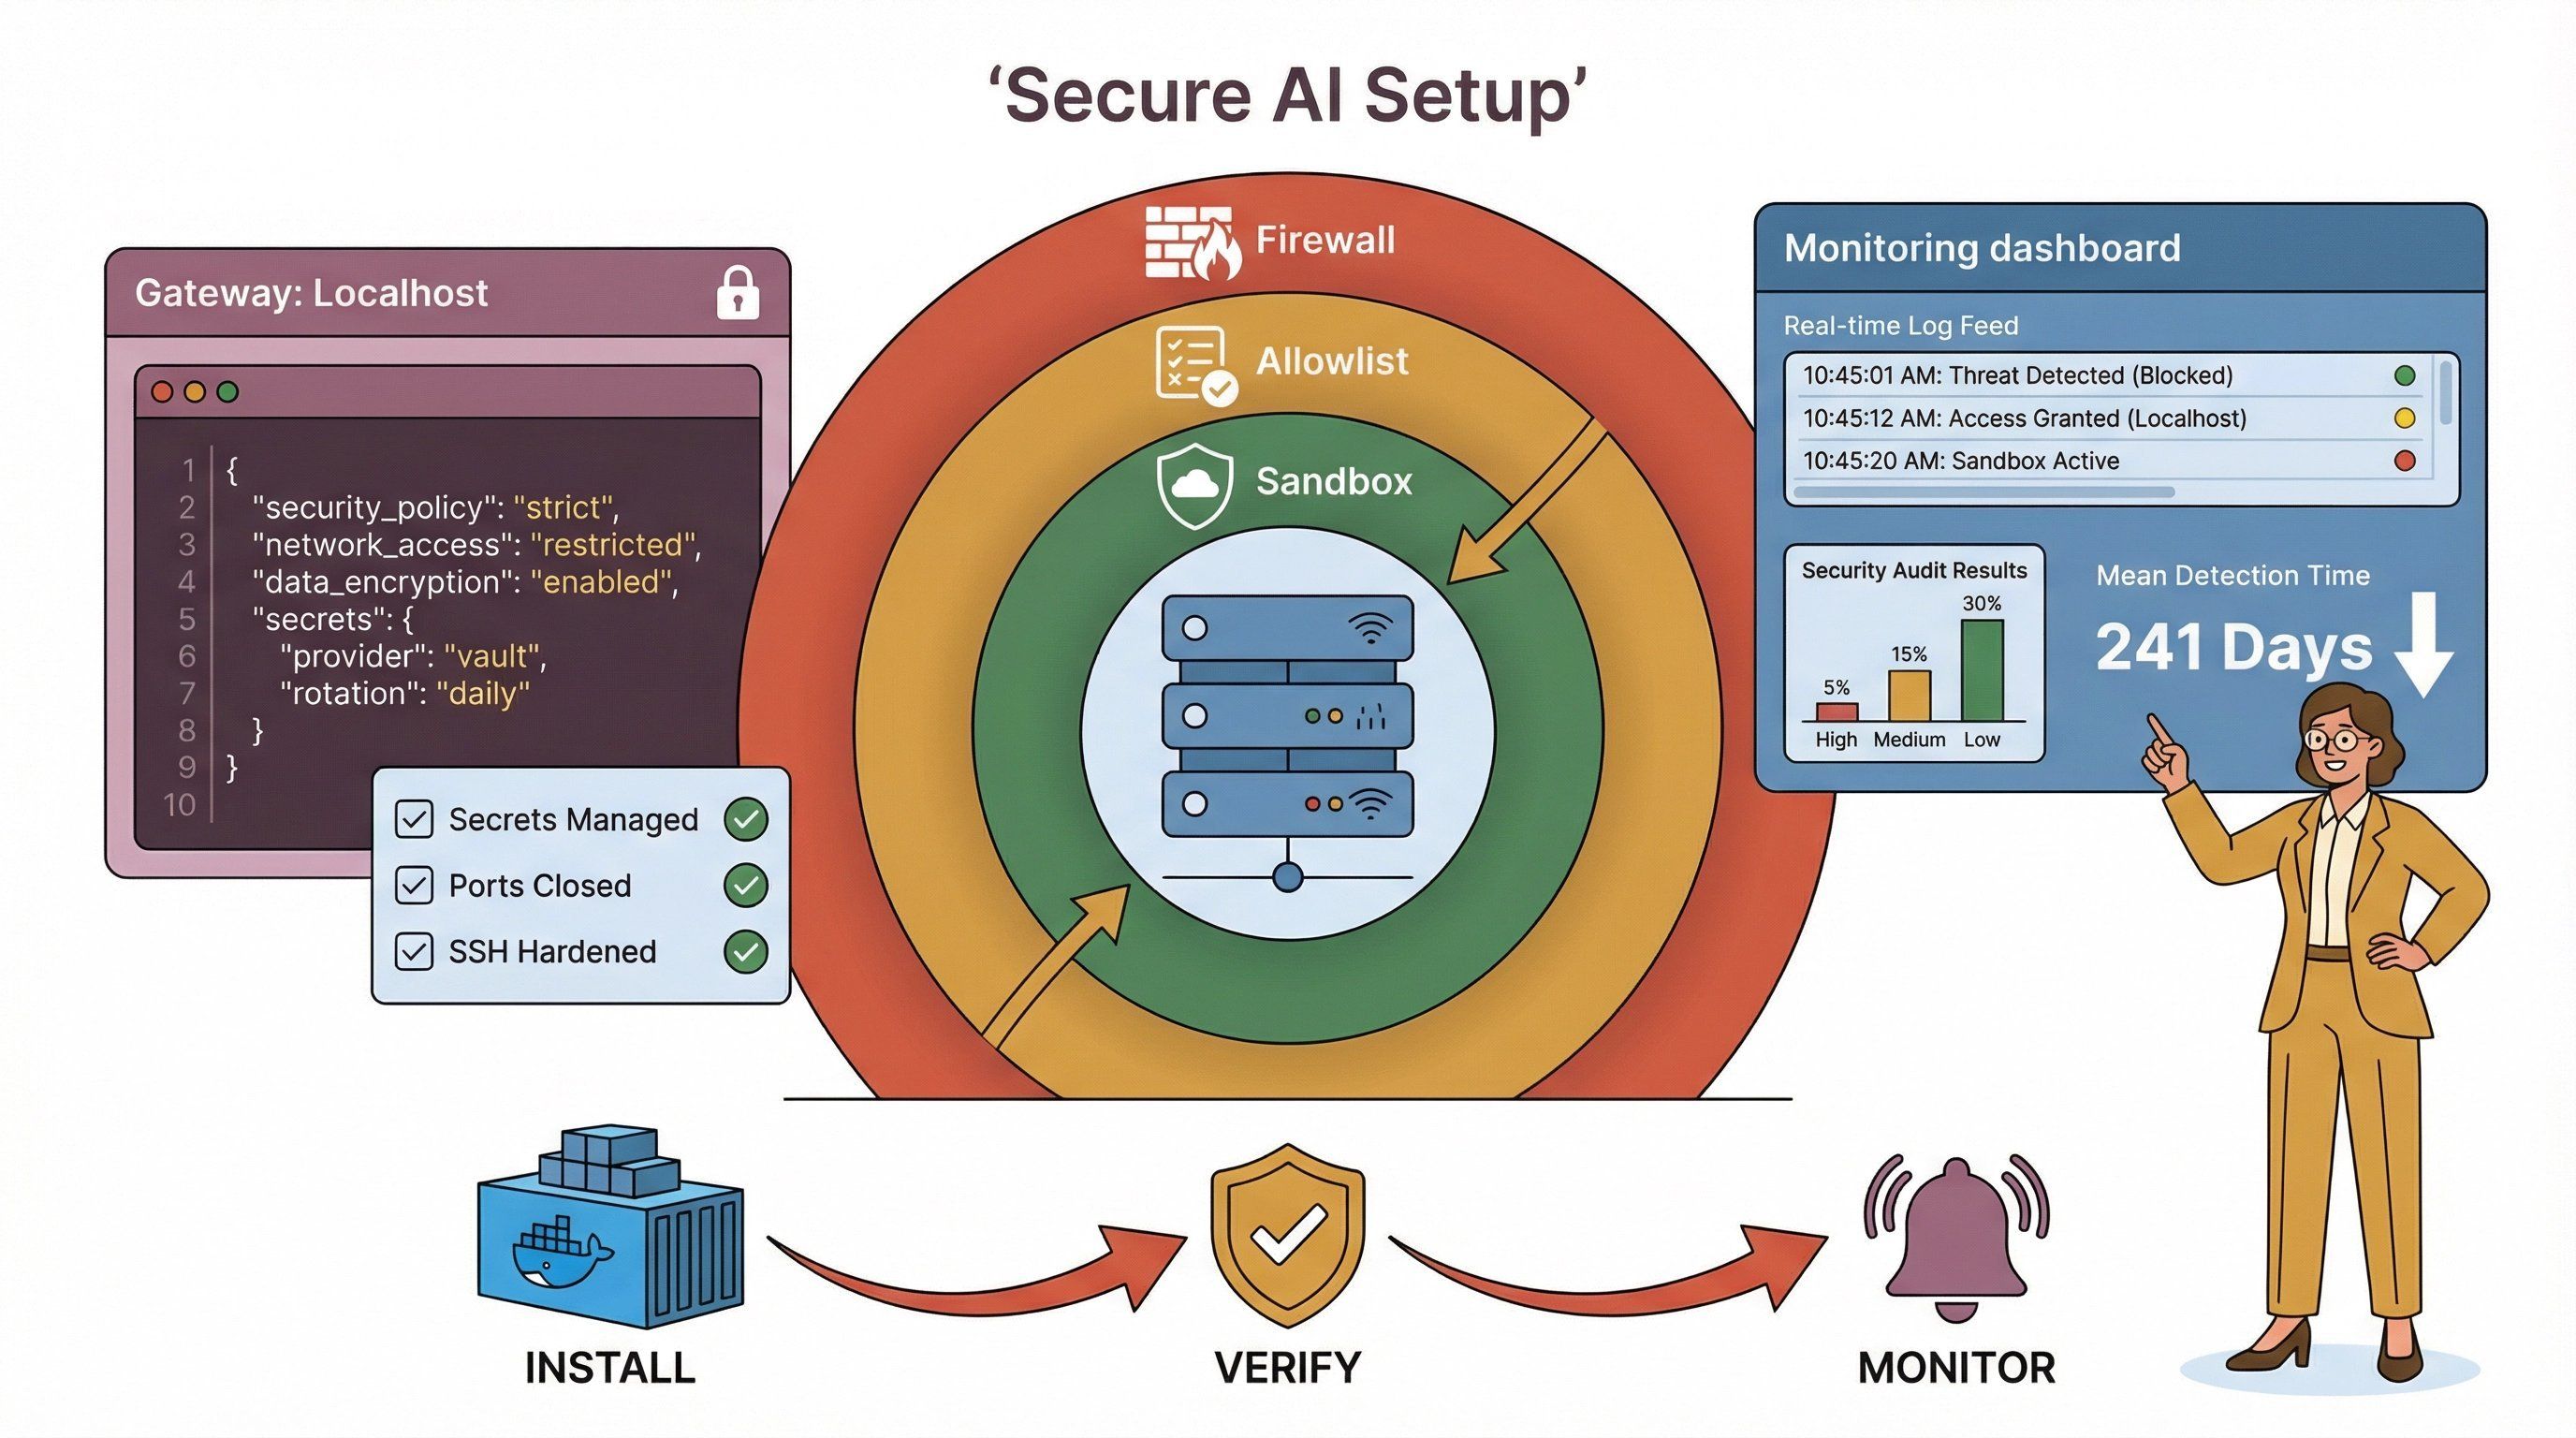
3. Bind Gateway to Localhost (or Tailnet)
- In your config, set the gateway to bind to
127.0.0.1(loopback) whenever possible. - If you need remote access, use Tailscale Serve or a VPN—never expose OpenClaw directly to the public internet ().
Sample config:
1{
2  "gateway": {
3    "bind": "loopback",
4    "tailscale": { "mode": "serve" },
5    "auth": {
6      "mode": "token",
7      "allowTailscale": false,
8      "token": { "source": "env", "provider": "default", "id": "OPENCLAW_GATEWAY_TOKEN" }
9    }
10  },
11  "secrets": {
12    "providers": { "default": { "source": "env" } }
13  }
14}
4. Set Up Strong Authentication
- Use long, random tokens for gateway access.
- Store tokens in environment variables or a secrets manager—never in plaintext configs.
5. Enable Sandboxing and Exec Approvals
- Turn on sandboxing for all tool execution ().
- Configure exec approvals and allowlists (see next section).
6. Install Only Trusted Plugins
- Vet every plugin before installation.
- Prefer plugins from the official registry; avoid random GitHub gists or npm packages.
7. Run Security Audits
- Use
openclaw security auditandopenclaw secrets auditto check for misconfigurations or leaked secrets ().
Essential Security Configuration Guide for OpenClaw in 2026
Once OpenClaw is up and running, it’s time to lock down the details.
1. Command Allowlists and Exec Approvals
- Define an explicit allowlist of safe commands (e.g.,
/usr/bin/git,/usr/bin/curl). - Set approvals to “ask on miss” and fallback to “deny” if no approval UI is available.
Sample config:
1{
2  "version": 1,
3  "defaults": {
4    "security": "deny",
5    "ask": "on-miss",
6    "askFallback": "deny",
7    "autoAllowSkills": false
8  },
9  "agents": {
10    "main": {
11      "security": "allowlist",
12      "ask": "on-miss",
13      "askFallback": "deny",
14      "autoAllowSkills": false,
15      "allowlist": [
16        { "bin": "/usr/bin/git" },
17        { "bin": "/usr/bin/curl" }
18      ]
19    }
20  }
21}()
2. Restrict Shell Access
- Only allow shell commands that are absolutely necessary.
- Never allow blanket
bashorshaccess unless you have a strong approval workflow.
3. Enforce API Key Management
- Use SecretRefs and environment variables for all credentials.
- Rotate keys regularly and audit for unused or stale secrets.
4. Prompt Injection Defenses
- Validate all user input and sanitize outputs.
- Use input/output restrictions and content filters where possible.
- Monitor for unusual patterns in logs (e.g., commands you didn’t expect).
5. Audit Logging and Monitoring
- Enable detailed logging for all agent actions, approvals, and denials.
- Store logs in a secure, tamper-evident location.
Real-Time Installation Log Monitoring with Thunderbit
Here’s where comes in handy. During and after installation, Thunderbit can help you:
- Scrape and analyze OpenClaw logs in real time: Use Thunderbit’s AI to extract, summarize, and categorize log entries—spotting misconfigurations or suspicious activity fast.
- Detect anomalies: Thunderbit’s AI-driven analysis can flag unexpected errors, repeated failed authentications, or unusual command executions.
- Alert on critical events: Set up Thunderbit to notify you (via Slack, email, or your favorite tool) if it detects a potential security issue.
Workflow example:
- Point Thunderbit at your OpenClaw log dashboard or API.
- Use “AI Suggest Fields” to extract key events (e.g., failed logins, denied approvals, plugin installs).
- Set up custom alerts for high-risk patterns.
- Export findings to Google Sheets or Notion for audit trails.
Thunderbit isn’t a full SIEM, but it’s a lightweight, AI-powered way to keep an eye on your OpenClaw deployment—especially for smaller teams without a dedicated security stack.
Ongoing Maintenance: Updates, Patching, and Security Policy Optimization
Security isn’t a one-and-done deal. OpenClaw is evolving fast, and so are the threats.
1. Regular Updates and Rolling Reviews
- Schedule a weekly or monthly review of your OpenClaw config files.
- Apply updates using
openclaw update—security releases should be applied immediately (). - After any update, re-run
openclaw doctorandopenclaw security audit.
2. Safe Patch Application
- Use VM snapshots or Docker image backups before major updates.
- Test updates in a staging environment if possible.
3. Automate Update Checks with Thunderbit
- Use Thunderbit to scrape the OpenClaw release feed or your own deployment status pages.
- Set up alerts for new security advisories or required patches.
4. Monitor for New Vulnerabilities
- Subscribe to OpenClaw’s security advisories and CVE feeds.
- Watch for plugin or dependency updates, not just core OpenClaw releases.
Building a Robust Security Response Plan for OpenClaw
Even with the best defenses, incidents can happen. Here’s how to prepare:
1. Incident Response Playbook
- Define clear steps for containment (e.g., shut down the gateway, revoke tokens).
- Assign roles: who investigates, who communicates, who restores service.
- Keep a checklist for forensic data collection (logs, configs, snapshots).
2. Use Thunderbit for Rapid Response
- Scrape and export all relevant logs immediately after an incident.
- Use Thunderbit’s AI to summarize what happened and flag suspicious events.
- Document the timeline and actions taken for compliance and learning.
3. Practice and Update
- Run tabletop exercises or simulated incidents at least twice a year.
- Update your response plan as OpenClaw evolves or your environment changes.
Security-First Automation: Safe First Steps with OpenClaw
It’s tempting to dive right into powerful automations, but start slow:
1. Begin with Read-Only Workflows
- Reporting, monitoring, and data summarization are low-risk.
- Avoid write/delete operations or shell commands until you’re confident in your setup.
2. Gradually Expand Permissions
- Add new capabilities one at a time, with human approval steps.
- Monitor logs and alerts after each change.
3. Continuous Monitoring
- Use Thunderbit or your favorite tool to keep an eye on agent behavior.
- Set up alerts for any escalation of privileges or unexpected actions.
Examples of safe automations:
- Scraping public sales leads and exporting to CRM (read-only).
- Monitoring server uptime or disk usage.
- Summarizing news articles or internal documentation.
Key Takeaways: Keeping OpenClaw Secure in 2026
Let’s recap the essentials:
- Don’t give AI full shell access by default—use allowlists, approvals, and sandboxing.
- Bind your gateway to localhost or tailnet—avoid public exposure unless absolutely necessary.
- Use strong authentication and manage secrets carefully—never store credentials in plaintext.
- Keep OpenClaw and all plugins up to date—patch quickly, review configs regularly.
- Monitor logs and automate alerts—tools like Thunderbit make this easy, even for small teams.
- Have a security incident response plan—practice, document, and improve over time.
- Start with safe, read-only automations—expand carefully, with continuous monitoring.
Security is a journey, not a destination. The OpenClaw ecosystem is moving fast, and so are the attackers. By following a security-first approach—and using tools like for monitoring and automation—you’ll keep your AI agent working for you, not against you.
For more tips, check out the and stay subscribed to OpenClaw’s security advisories.
FAQs
1. Why shouldn’t I give OpenClaw full shell access during installation?
Granting full shell access to an AI agent like OpenClaw dramatically increases your risk of prompt injection attacks, credential leaks, and system compromise. By default, restrict shell access with allowlists and approvals, and only enable broader permissions after careful review and monitoring ().
2. What’s the safest way to expose OpenClaw for remote access?
The recommended approach is to bind the gateway to 127.0.0.1 (loopback) and use a tailnet solution like Tailscale Serve for secure remote access. Avoid public internet exposure whenever possible, and always require strong authentication ().
3. How can Thunderbit help with OpenClaw security?
Thunderbit can scrape and analyze OpenClaw logs, detect misconfigurations, and alert you to suspicious activity in real time. It’s especially useful for monitoring installation and configuration changes, even if you don’t have a full SIEM setup ().
4. How often should I update OpenClaw and its plugins?
Check for updates at least weekly, and apply security patches immediately. After any update, run openclaw doctor and openclaw security audit to ensure your configuration remains secure ().
5. What should I do if I suspect my OpenClaw instance has been compromised?
Immediately contain the incident by shutting down the gateway and revoking credentials. Collect logs and configs for forensics, and use Thunderbit or similar tools to analyze what happened. Follow your incident response plan and update it based on lessons learned ().
Stay safe, automate smart, and remember: in 2026, security-first isn’t just a best practice—it’s the only practice that keeps your AI agent on your side.
Learn More